Facebook Live Streaming: Your Simple Beginner’s Guide
Facebook Live allows you to live-stream events, performances, and gatherings on the social media platform. Viewers can watch from their phones, computers, or any method they wish to connect. You can interact with your audience by using reactions, shares, comments, and other interactive features.
It should be noted, at this point, that Instagram live-streaming is very distinct from Facebook live-streaming.
On Facebook, you can go live on a page, in a group, or at an event. Going live on a Page provides you with more tools and capabilities than going live on a group or event. When you use the online events feature, you will be able to use all of the Page live-streaming tools when going live at an event.
Live streams to Pages have the following features that group and event live streams do not:
-
Cross-posting to other pages is possible. Crossposting is only possible for live broadcasts to a Page.
-
In Creator Studio, the ability to access detailed insights.
-
On Facebook, you can use age and geographic gating to restrict access to your live stream to a specific geography or age demographic.
If you only want members of a specific group to see your video, go live in that group. You can also share your live stream with a group or of an event if you post it to a Page.
Lights, Camera, Live!
You are now ready to go live on Facebook. What do you have to do first? We have provided the following outline that we have found quite helpful in getting us ready for live streaming.
Choose between using a phone and a camera.
There are two methods for going live on Facebook. You can connect a camera with streaming software to Facebook or use a phone with the Facebook app installed.
If you want to go live on Facebook, use your phone if you:
-
Are constantly on the move.
-
You don't have access to additional equipment such as a computer, a camera, a microphone, and so on.
-
There is no need to include on-screen graphics or switch between cameras.
Use a separate camera and streaming software if you:
-
Want to improve the video and audio quality.
-
Would like to include graphics or other advanced features (note that extra software may sometimes be required).
-
Have access to additional equipment such as a computer, camera, microphone, and so on.
Now that you have decided which initial route you would like to take, we’ll look at the other things you might want to take into consideration for either one.
Going live on a phone
As previously stated, you can go live using the Facebook app for iOS or Android.
The quality of your stream is determined by the speed of your Internet connection as well as the phone or tablet you're using.
When you have a strong connection, go live (whenever possible, use Wi-Fi rather than your phone's mobile data). We recommend a tripod or camera stabiliser be used to create a more stable video stream.
Going live on a camera and streaming software
You'll need streaming software to go live with a webcam (also referred to as encoding software or an encoder). The optimal encoder for you may be determined by the type of content you intend to stream. There are a variety of programmes to pick from, including open-source software that is free.
You're ready to go live with Live Producer on Facebook once you've installed your encoding software and camera. With higher-end production equipment and streaming software, Live Producer is the new way to go live on Facebook. On a desktop or laptop computer, go to https://www.facebook.com/live/producer to open Live Producer.
Live Producer
What is this Live Producer, you might be asking? It is Facebook’s platform that enables you to go live on Facebook with higher-end production equipment and streaming software, as well as a desktop/laptop camera.
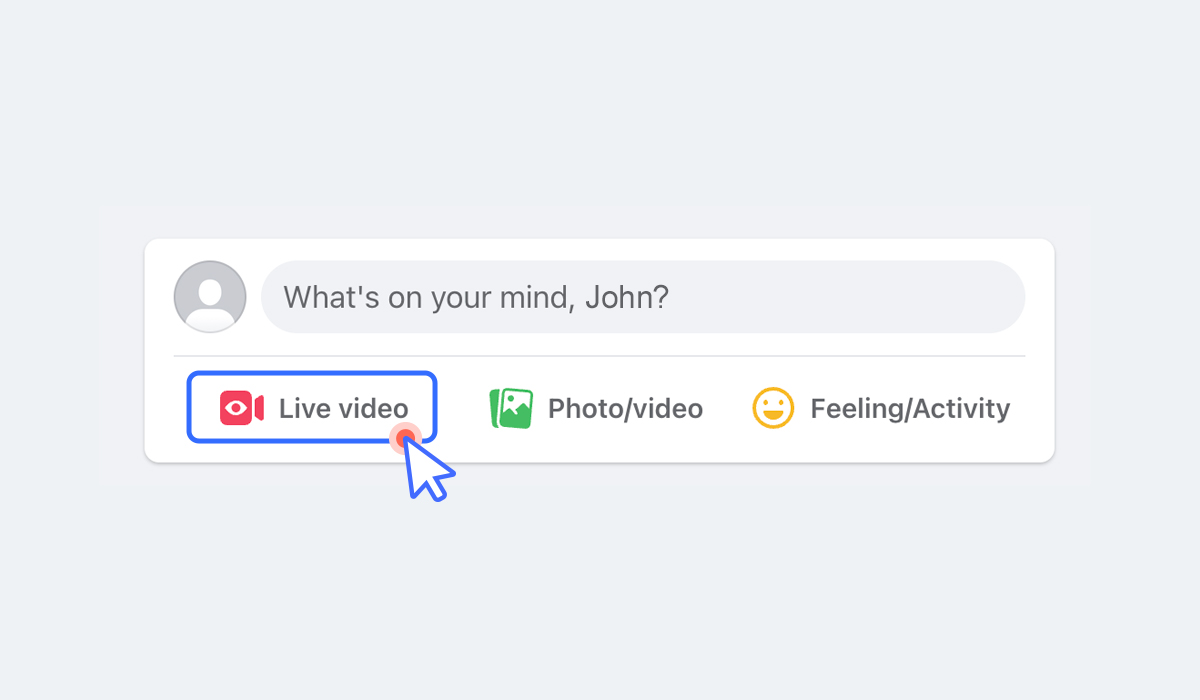
Live Producer is accessible from your page (where you normally post updates, there’s a tab that says “Live video”) as well as from the aforementioned facebook.com/live/producer link.
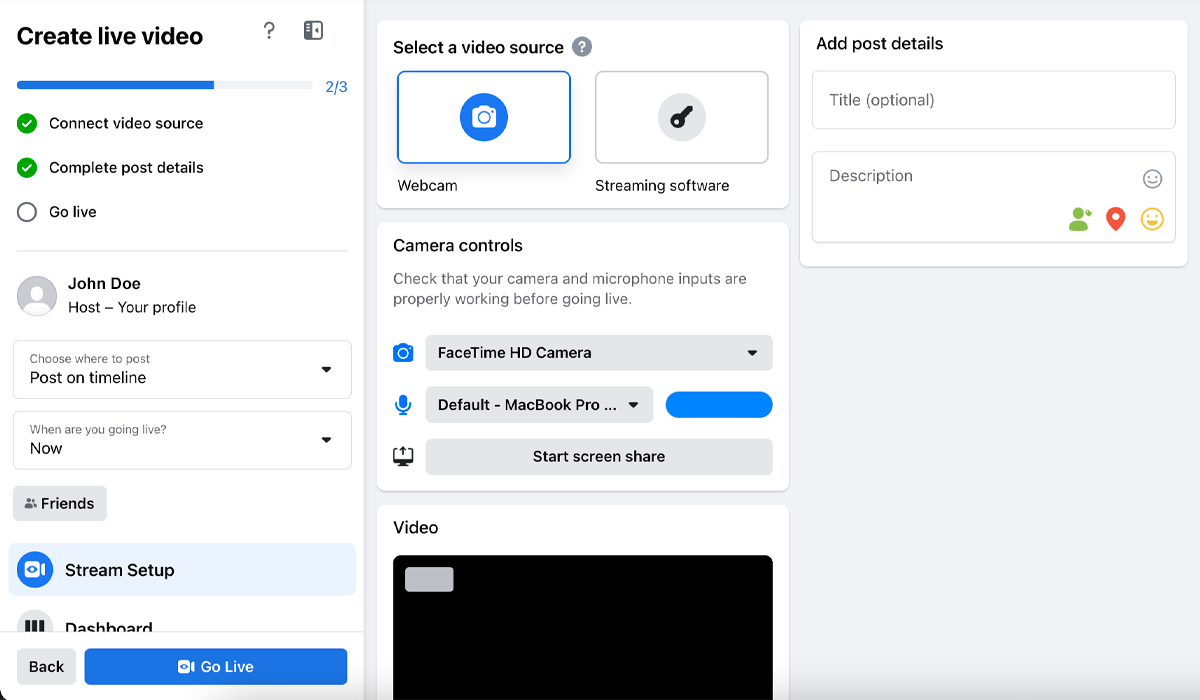
On the left-hand column, you can manage your live posts, scheduling, and certain broadcast settings. On the right side will be where you give a title to your stream as well as a short description of what the stream will be about. In the centre column will be where you can select your camera as well as microphone and if you would like to share one of your screens.
The Stream setup and Dashboard section of Live Producer, contain critical functions such as Source Details and Stream Health.
You can also configure interactive features such as polls, questions, and graphics in the Dashboard section (under the “Interactivity” section) and choose whether or not to crosspost your broadcast.
How can people watch your live stream?
Viewers with or without a Facebook account can watch live streams. Viewers who do not have a Facebook account can access the stream directly by typing in the live stream URL, or they can watch the live stream embedded on your website or blog.
Viewers can also watch your live stream on their television by downloading the Facebook Watch TV app or casting the stream to their television.
Getting hype for your live stream
-
Share on Facebook in groups, as well as on Pages and profiles that you manage. Your viewers can also share the live video with their friends, but be cautious when encouraging them to do so.
-
Cross-post the same live stream to multiple Pages at the same time. Create a cross-posting relationship with another Page to crosspost your live video. Find out more.
-
Embed the live stream on your website or blog. The embed code can be found in the Facebook Live Producer settings. You can also choose whether or not others can embed your live stream.
Plan your live streams in advance
You can schedule a live stream up to one week in advance if you use a connected camera and encoder. We recommend scheduling live broadcasts ahead of time to alert your audience of upcoming broadcasts and make it easier for them to connect when your stream starts.
When you schedule a live broadcast, two posts are created automatically:
-
Announcement post: When you schedule a live broadcast, an announcement post is published on your Page, informing your followers that a broadcast is coming up. People who see the announcement post can click "Get reminder" to get a one-time reminder notification just before the cast begins.
-
A live broadcast post: A post containing your live stream is automatically published at the scheduled time of the live broadcast. People who expressed interest in the announcement post will receive a notification with a link to the broadcast.
Scheduling a live stream on Facebook
In Live Producer, you can schedule a Facebook live video up to one week in advance.
When you schedule a video, your audience will be immediately notified via an automated post announcing your upcoming broadcast.
Once that specified date and time arrive, a second post containing the live broadcast will be automatically published.
The only thing to ask yourself now is:
What are the steps to schedule a stream?
We've condensed the process into these 5 simple steps for you.
-
Go to the Live Producer page.
-
Select Set up a live video event.
-
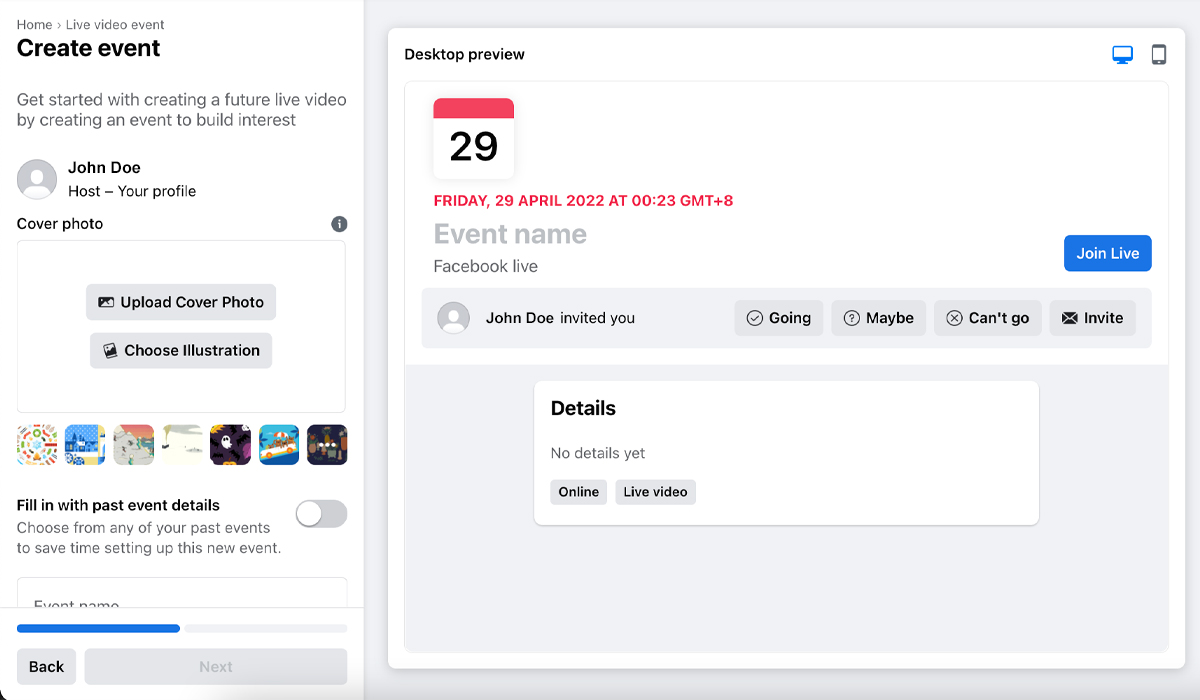
Choose a name for your event and a date and time for your live broadcast. Choose an image to go with the announcement. 1.91:1 is the ideal picture ratio. Next should be selected.
-
Set up the remainder of your scheduled broadcast as you would a live video post.
-
To schedule your broadcast, click Create event.

At the stated start time, your live video will begin automatically. Your video will be cancelled if you do not go live within 10 minutes of the planned time.
You can see a preview of your stream 20 minutes before it starts. To view your stream, go to the Upcoming live videos page and select Edit post to make sure it's correctly set up before going live.
Post 1: Announcement post
When you have scheduled your live broadcast, an announcement post is automatically posted to your Page, informing your followers of the upcoming broadcast. People who see the announcement post can choose to receive a one-time reminder notification soon before the broadcast begins by clicking "Get reminder".
Post 2: Streaming Time!
A second post featuring your Facebook live stream is automatically published at the set time of the live broadcast. A notification will be sent to those who expressed interest in the first announcement post, pointing them to the broadcast.

Both posts will remain on your Page or profile's timeline once the broadcast is finished, but the live broadcast post will become a video post and will show in your video library.
The announcement post will contain a CTA driving to the live-stream once the live-stream has been launched. You have the option of removing the announcement from your timeline.
The live broadcast post will become a video post after the stream is finished, and it will appear in the video library under Creator Studio.
Avoiding using copyrighted materials
One last thing to note here is that you have to take note that Facebook's Terms of Service prohibit users from posting content that infringes on someone else's intellectual property rights, including copyright and trademark.
The use of commercial music without the necessary permissions may result in the stream being removed from Facebook.
If your stream includes background music, this may lead to copyright strikes happening by accident. When in doubt, go ahead and their free, globally licensed, music and sound effects library.
There are two main sources where we’ll recommend you go for your royalty-free music needs - Facebook Creator Studio or YouTube’s Audio Library.
Closing Words
With that, it is safe to say that you are now armed with all the required knowledge that you will need to start streaming live on Facebook today!
We do have one more trick up our sleeve, however. Did you know that you could sell items on Facebook Live while also linking to your ecommerce website?
Yes, that is right, we can do that for you! Our Shopcada solution links in real-time with Facebook Live streams and you can run your entire stream for your business from one platform instead of having to use your profile to sell your products or having to deal with the headache of running multiple accounts.
More articles please read Your quick guide to Search Engine Optimisation

