The Ninja Van API integration enables end-to-end shipment management directly from the Shopcada platform, streamlining fulfilment operations with real-time sync and automation.
What's New
-
Enhanced authentication via Ninja Van API
-
Improved real-time sync and tracking capabilities.
-
Streamlined package creation directly within Shopcada
Install the NinjaVan API Module
-
Navigate to Dashboard > App Store
-
Search for the NinjaVan API module and click Install
IF YOUR STORE HAVE EXISTING NINJAVAN INTEGRATION, TO UPGRADE,
-
Navigate to Dashboard > Settings > Orders > Carriers Settings.
-
Select Ninjavan Advanced and click Configure.
-
At System > Authorization Mode, select "Oauth" and click Save button
-
Click Connect to initiate login.
-
Login to your Ninja Van account.
-
On the permission screen, click Allow to grant access.
-
Once authorised, return to the settings page to confirm integration is “Connected”.
- You may continue configuration by refering to Configure Ninjavan API Integration in Shopcada section below.
Connect your Shopcada store with Ninja Van
-
Navigate to Dashboard > Settings > Orders > Carriers Settings.
-
Select Ninjavan Advanced and click Configure.
-
Click Connect to initiate login.
-
Login to your Ninja Van account.
-
On the permission screen, click Allow to grant access.
-
Once authorised, return to the settings page to confirm integration is “Connected”.
If you yet to have an Ninja Van account, please approach Ninja Van for setting up.
Configure Ninjavan API Integration in Shopcada
-
Once authorised, you will redirect back to the settings page.
-
Your Application Client Key shall be auto filled.
-
Enabled Request to use order number as the tracking number.
-
Key in Default Delivery Instruction [Optional].
-
Enabled Include checkout comment as delivery instruction, if needed.
-
Select your Default Pickup Window: 09:00 - 2200.
-
Under Service Setting, match your shipping method vs NV service level.
-
Under Return To Sender Handling, enter an email address of operation team to notify when packages returned to sender.
-
Complete the Package Pickup Address with the your address details.
Set Up Shipment Notifications
-
Navigate to Dashboard > Settings > Emails > Email List.
-
Under Order Fulfilment, enable the following notifications:
-
Shipment Notification - Ninjavan Advanced - At Shipper: Sent when SingPost picks up the parcel from your warehouse.
-
Shipment Notification - Ninjavan Advanced - Shipped: Sent when SingPost delivers the parcel to the customer.
-
You can include tracking information in these emails using the token [package-tracking-number].
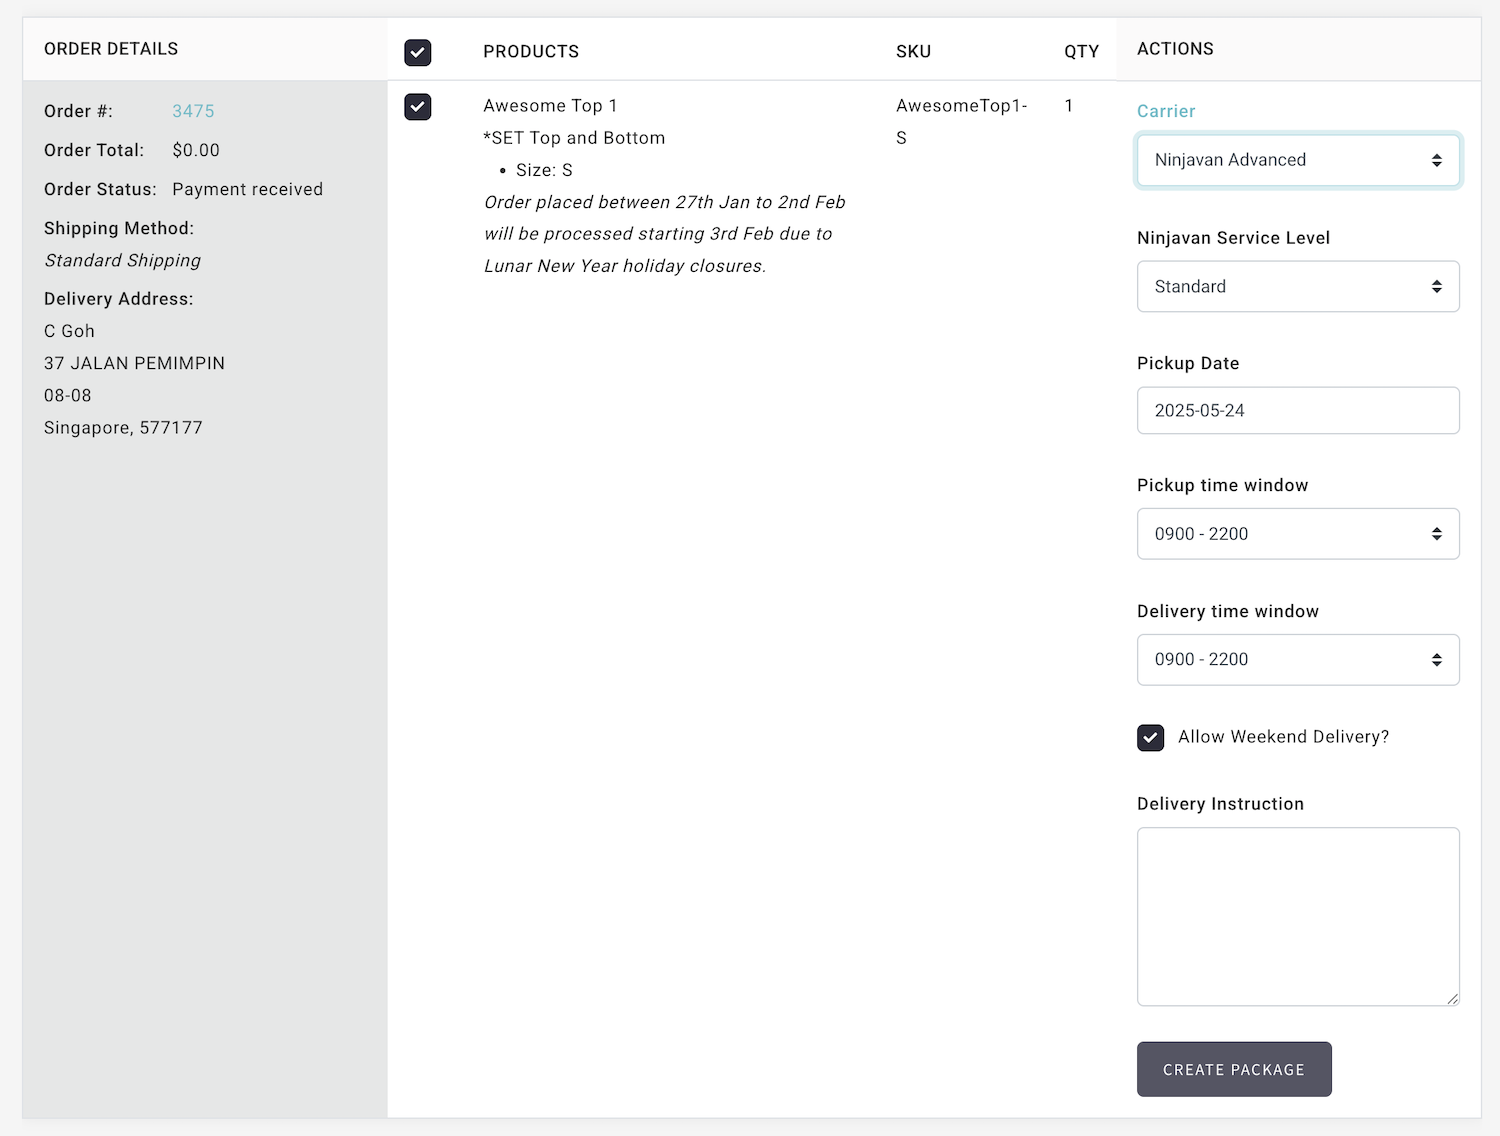
Create Package for Individual Order
-
Navigate to Dashboard > Orders > Fulfil Orders.
-
Apply filters to locate the desired order.
-
Select the items to be shipped.
-
Choose Ninjavan Advanced from the Carrier list.
-
Select the Ninjavan Service Code, Pickup Date, Pickup Time Window, Delivery Time Window, and Delivery Instruction.
-
Click Create Package. The shipment will be created automatically in the Ninjavan portal.
-
Customers will receive notifications as the parcel progresses through the delivery process.
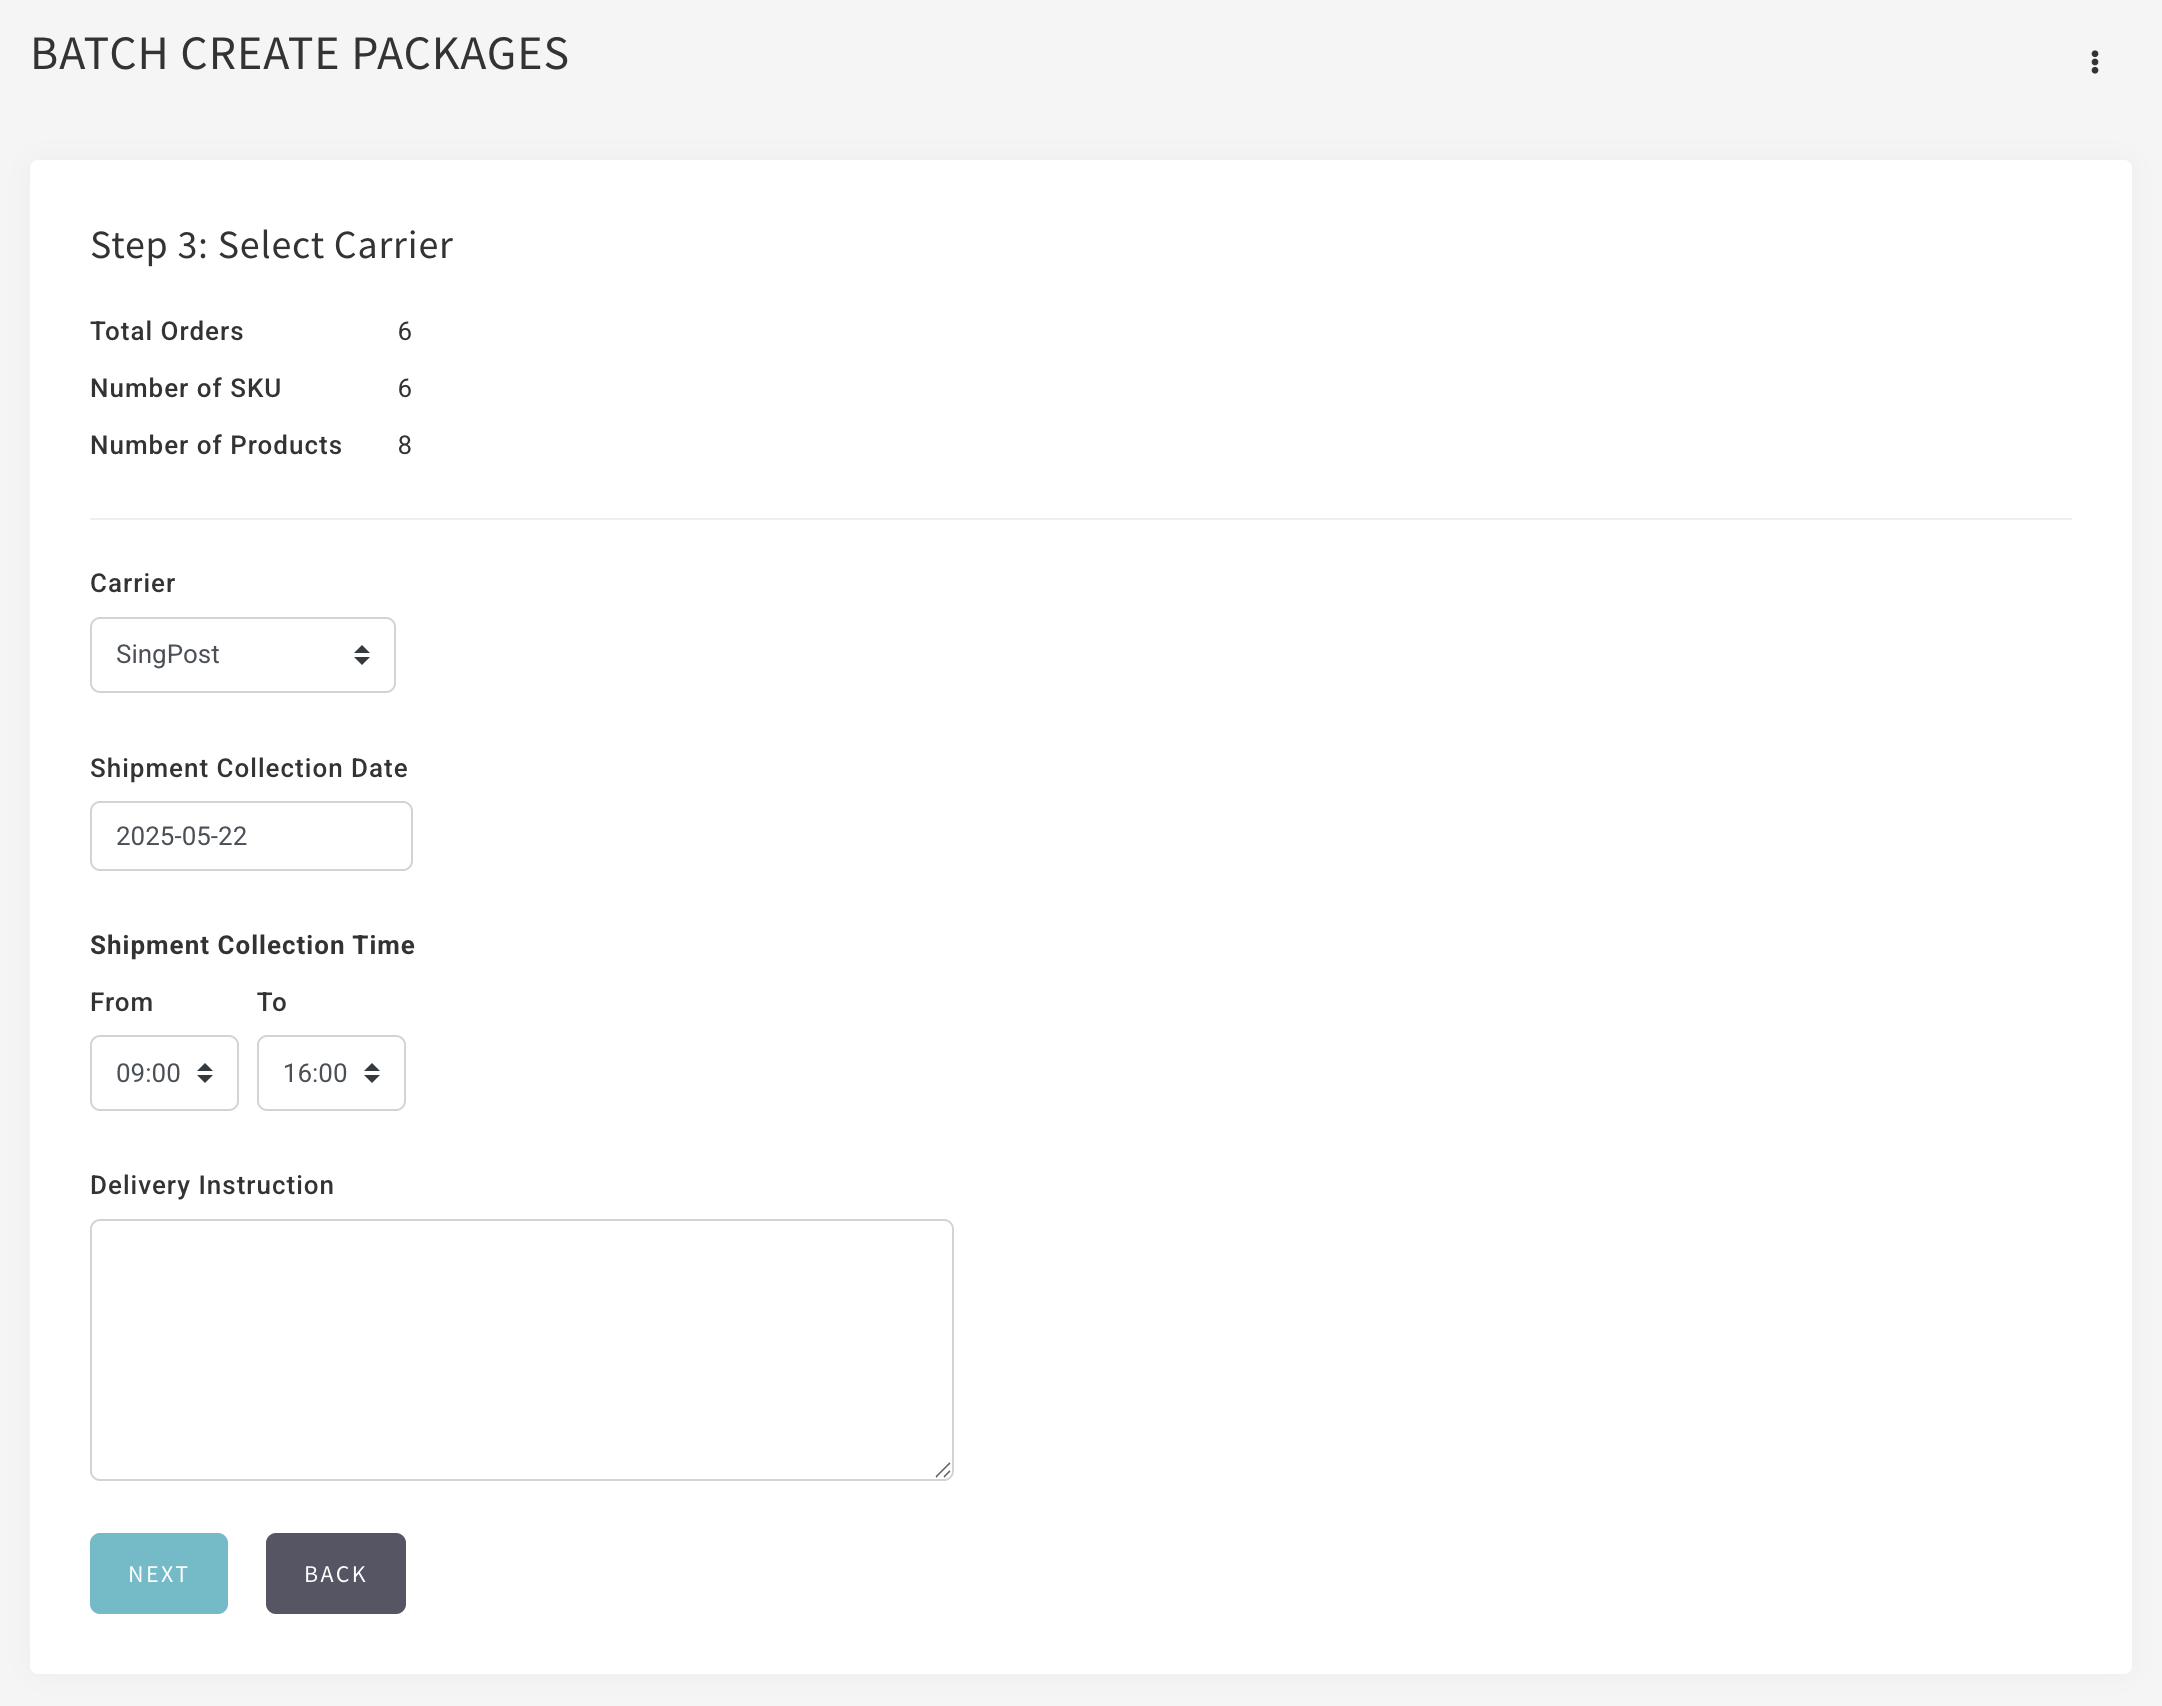
Create Packages in Batch
-
Navigate to Dashboard > Orders > Fulfil Orders.
-
Click on the vertical ellipsis and select Batch Create Packages.
-
Process your packages as usual.
-
At Step 3: Select Carrier, choose Ninjavan Advanced from the list.
-
Select the Ninjavan Service Level, Pickup Date, Pickup Time Window, and Delivery Instruction.
-
Click Next. Shipments will be created automatically in the SingPost portal.
-
Customers will be notified as their parcels are processed and delivered.