The new Dual Screen feature allows customers to participate more actively in the checkout process. This includes viewing their cart contents and entering or confirming their personal information directly on a secondary screen.
Feature Overview
-
Display Cart to Customer:
Shoppers can see the real-time cart summary on the second screen during checkout. -
Customer Lookup:
Customers can search using their phone number or email address. -
Create Account:
Customers can directly enter their details if not found in the system.
Admin Setup – Enable Dual Screen
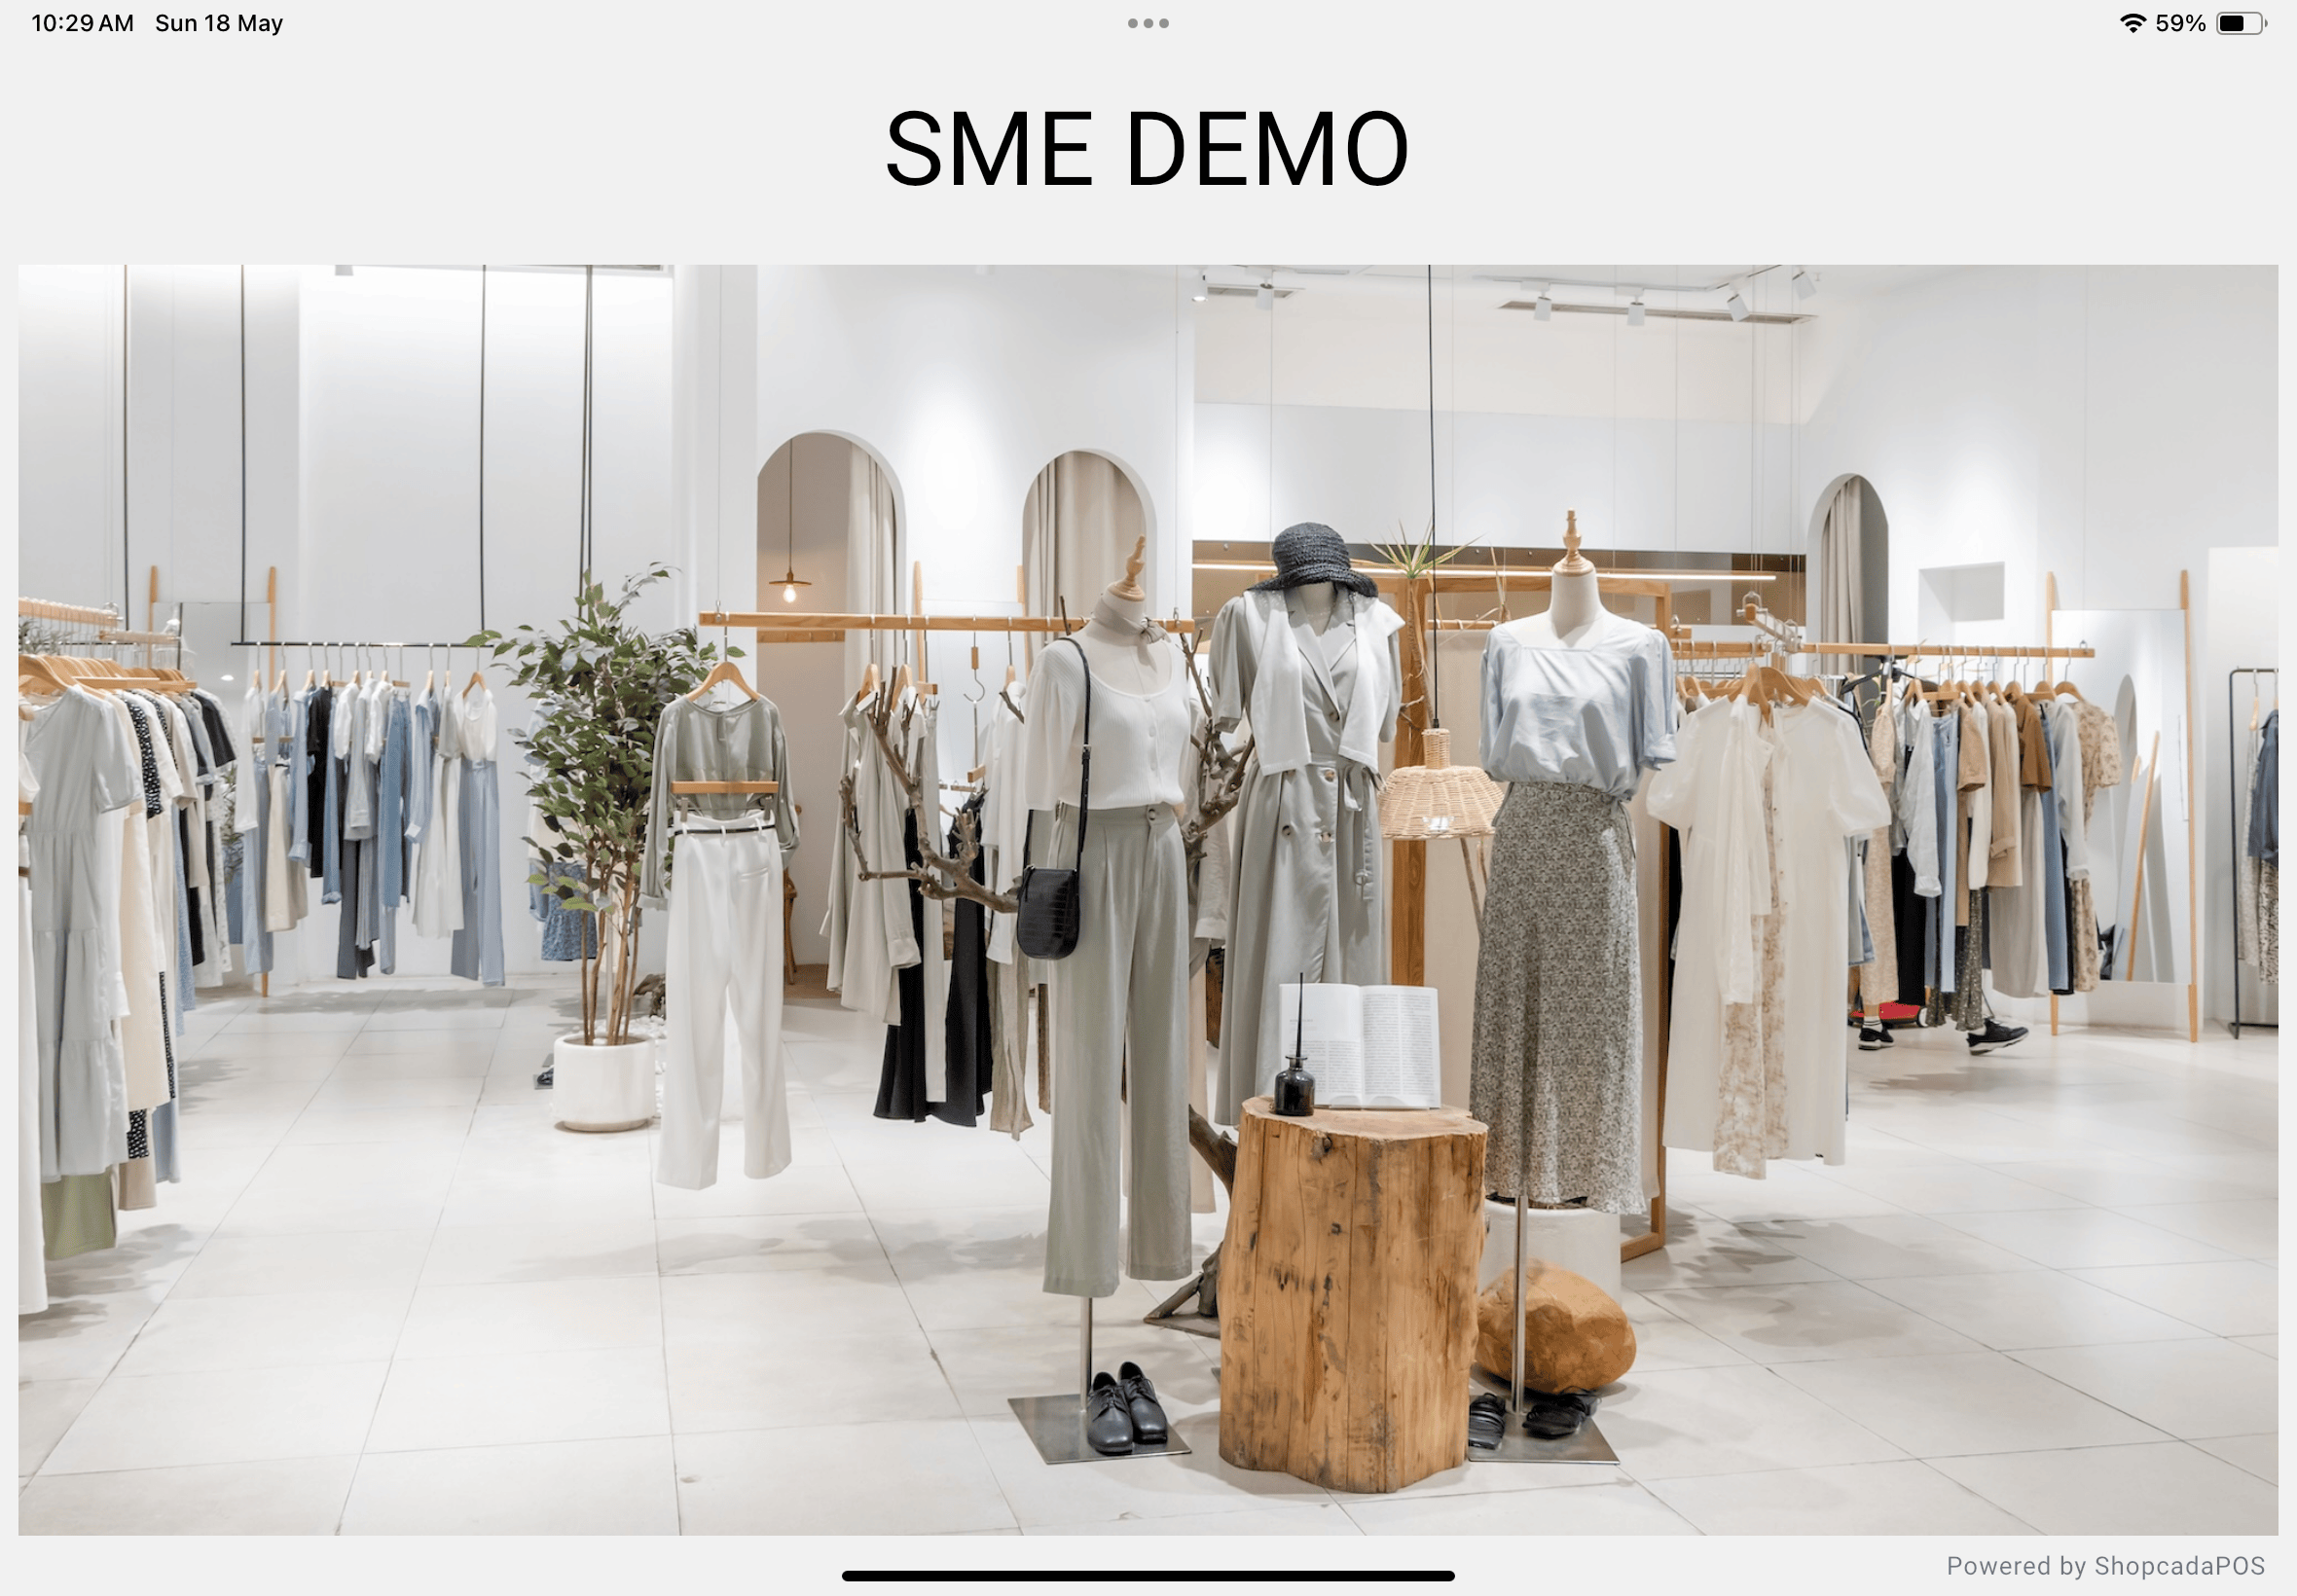
Store Logo and Landing Page
-
Go to Dashboard > POS > Select Outlet > Edit Outlet.
-
Under the Dual Screen section:
-
Upload your logo and promotional image.
-
Recommended image size is 2048px × 1152px (16:9)
-
Banner can be in JPG, PNG or GIF format.
Admin Setup – Enable Dual Screen
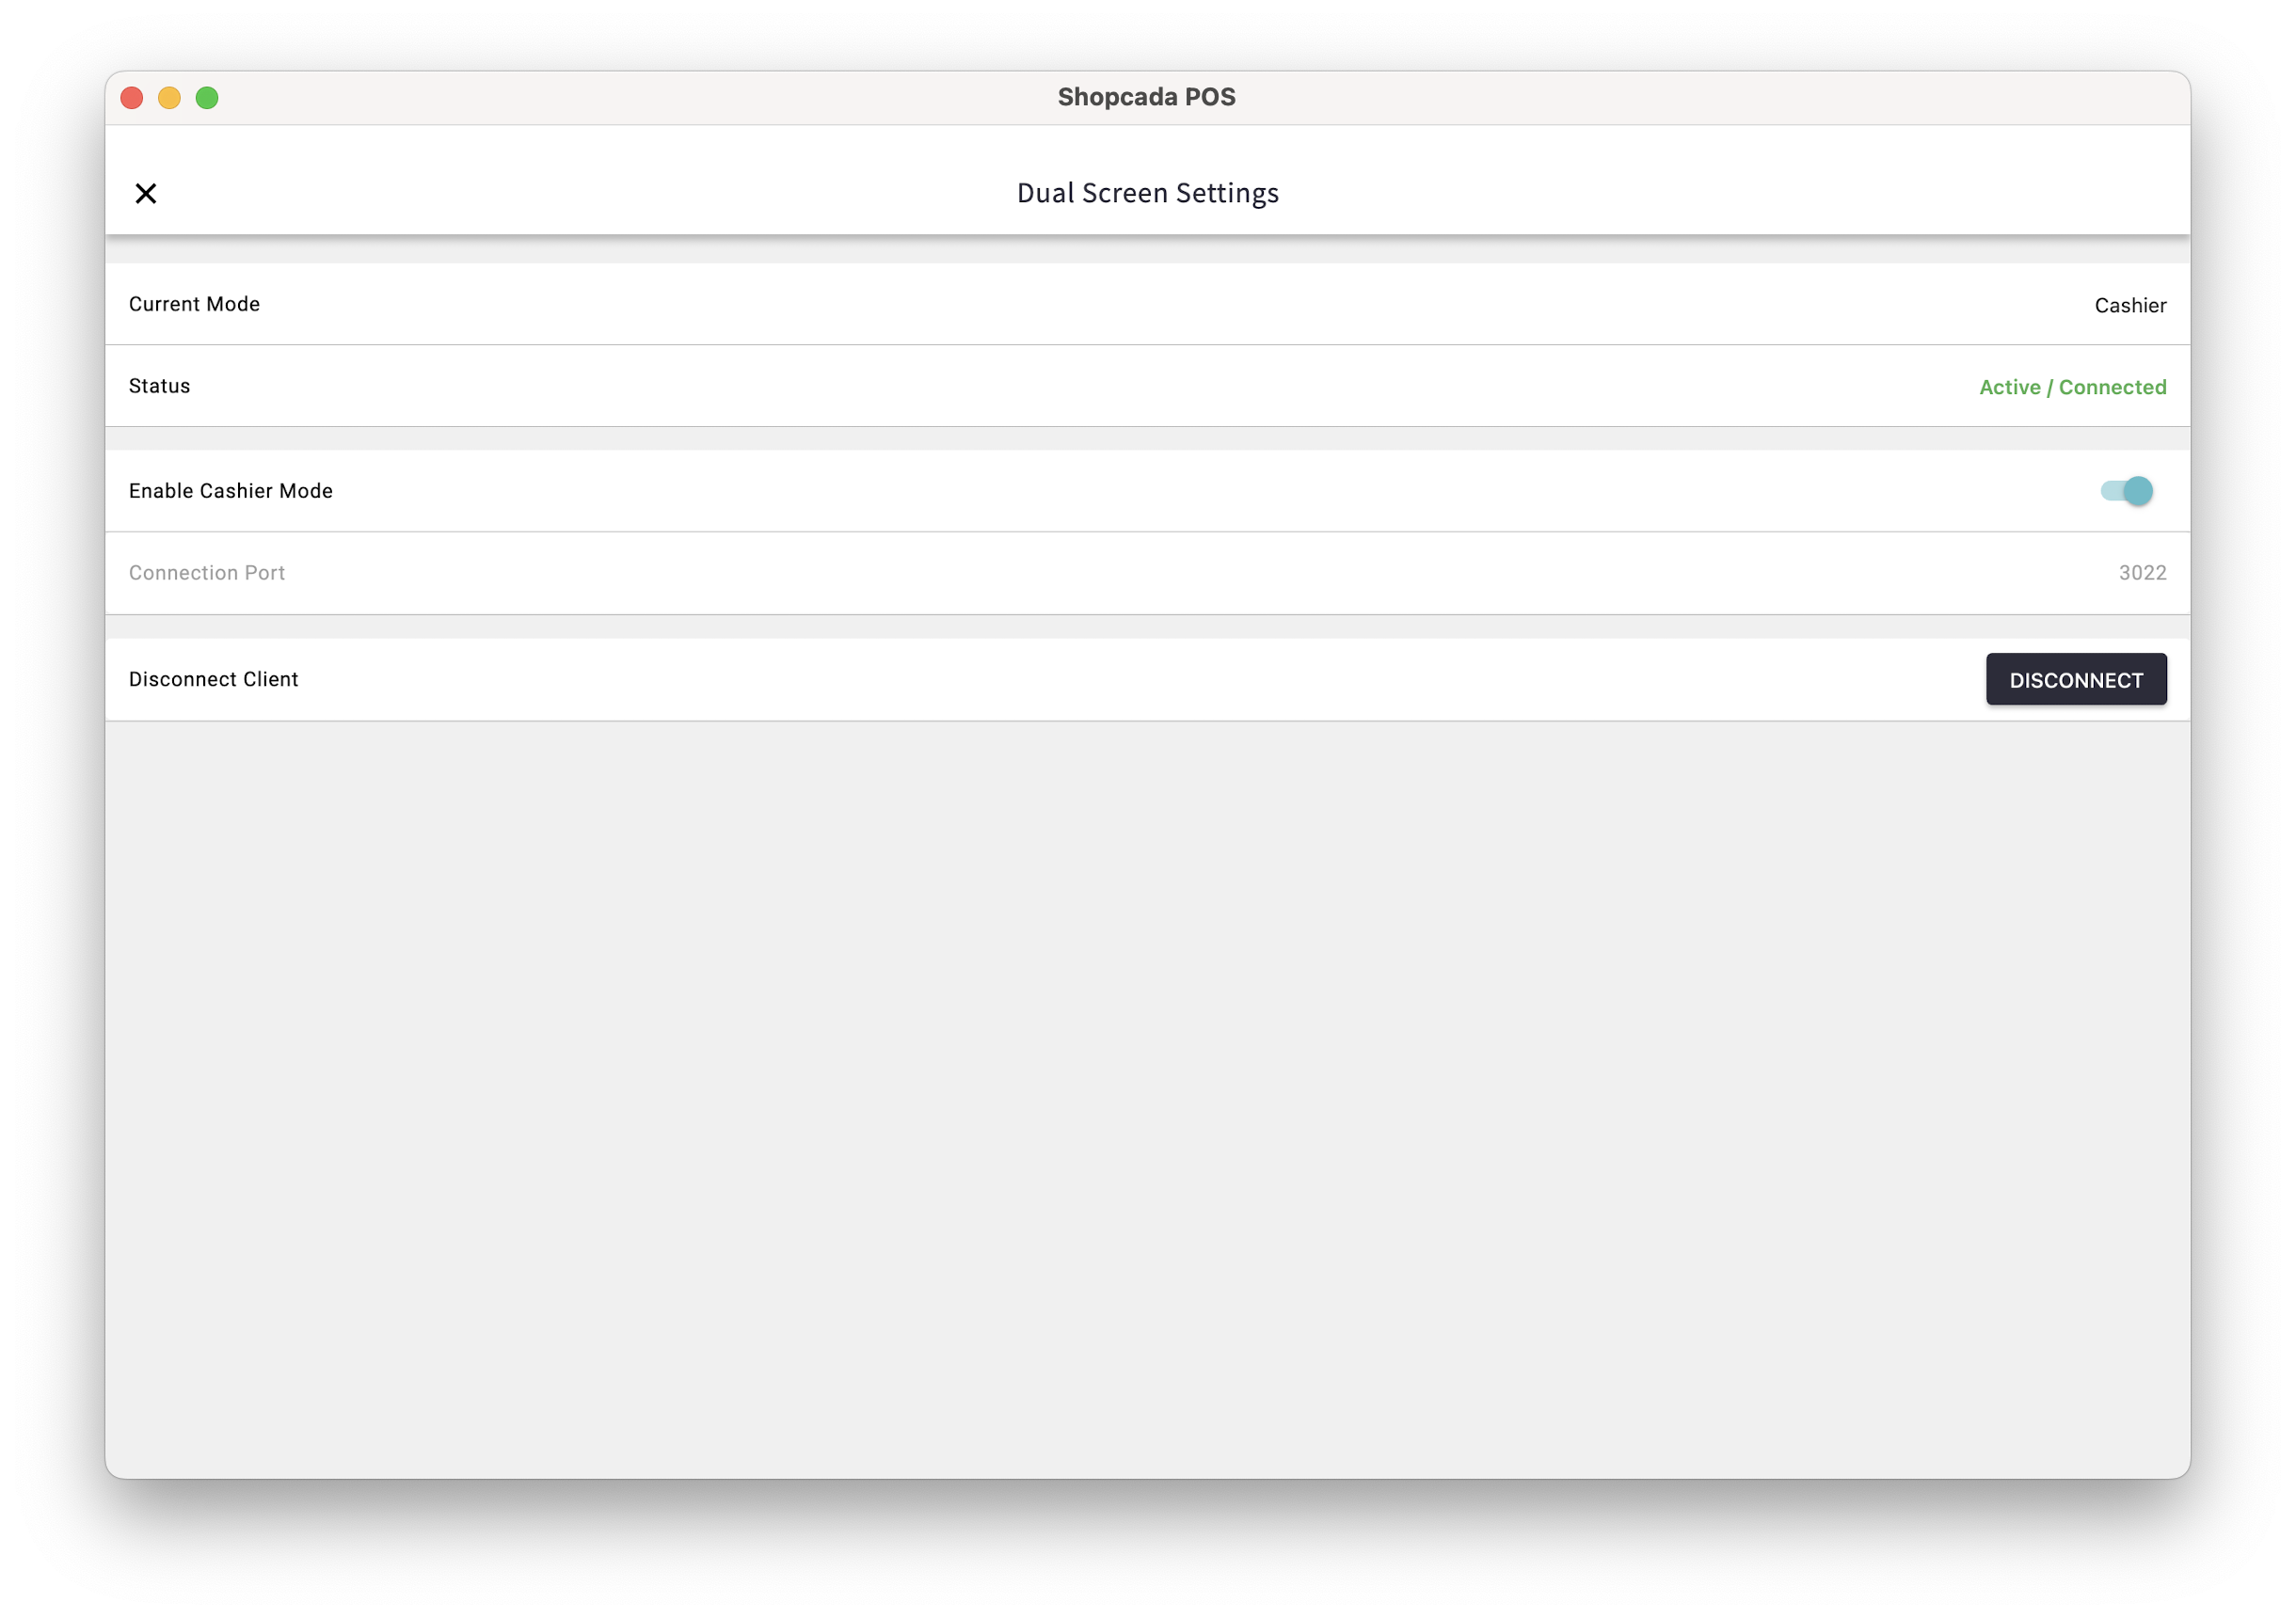
Setup the Cashier Mode
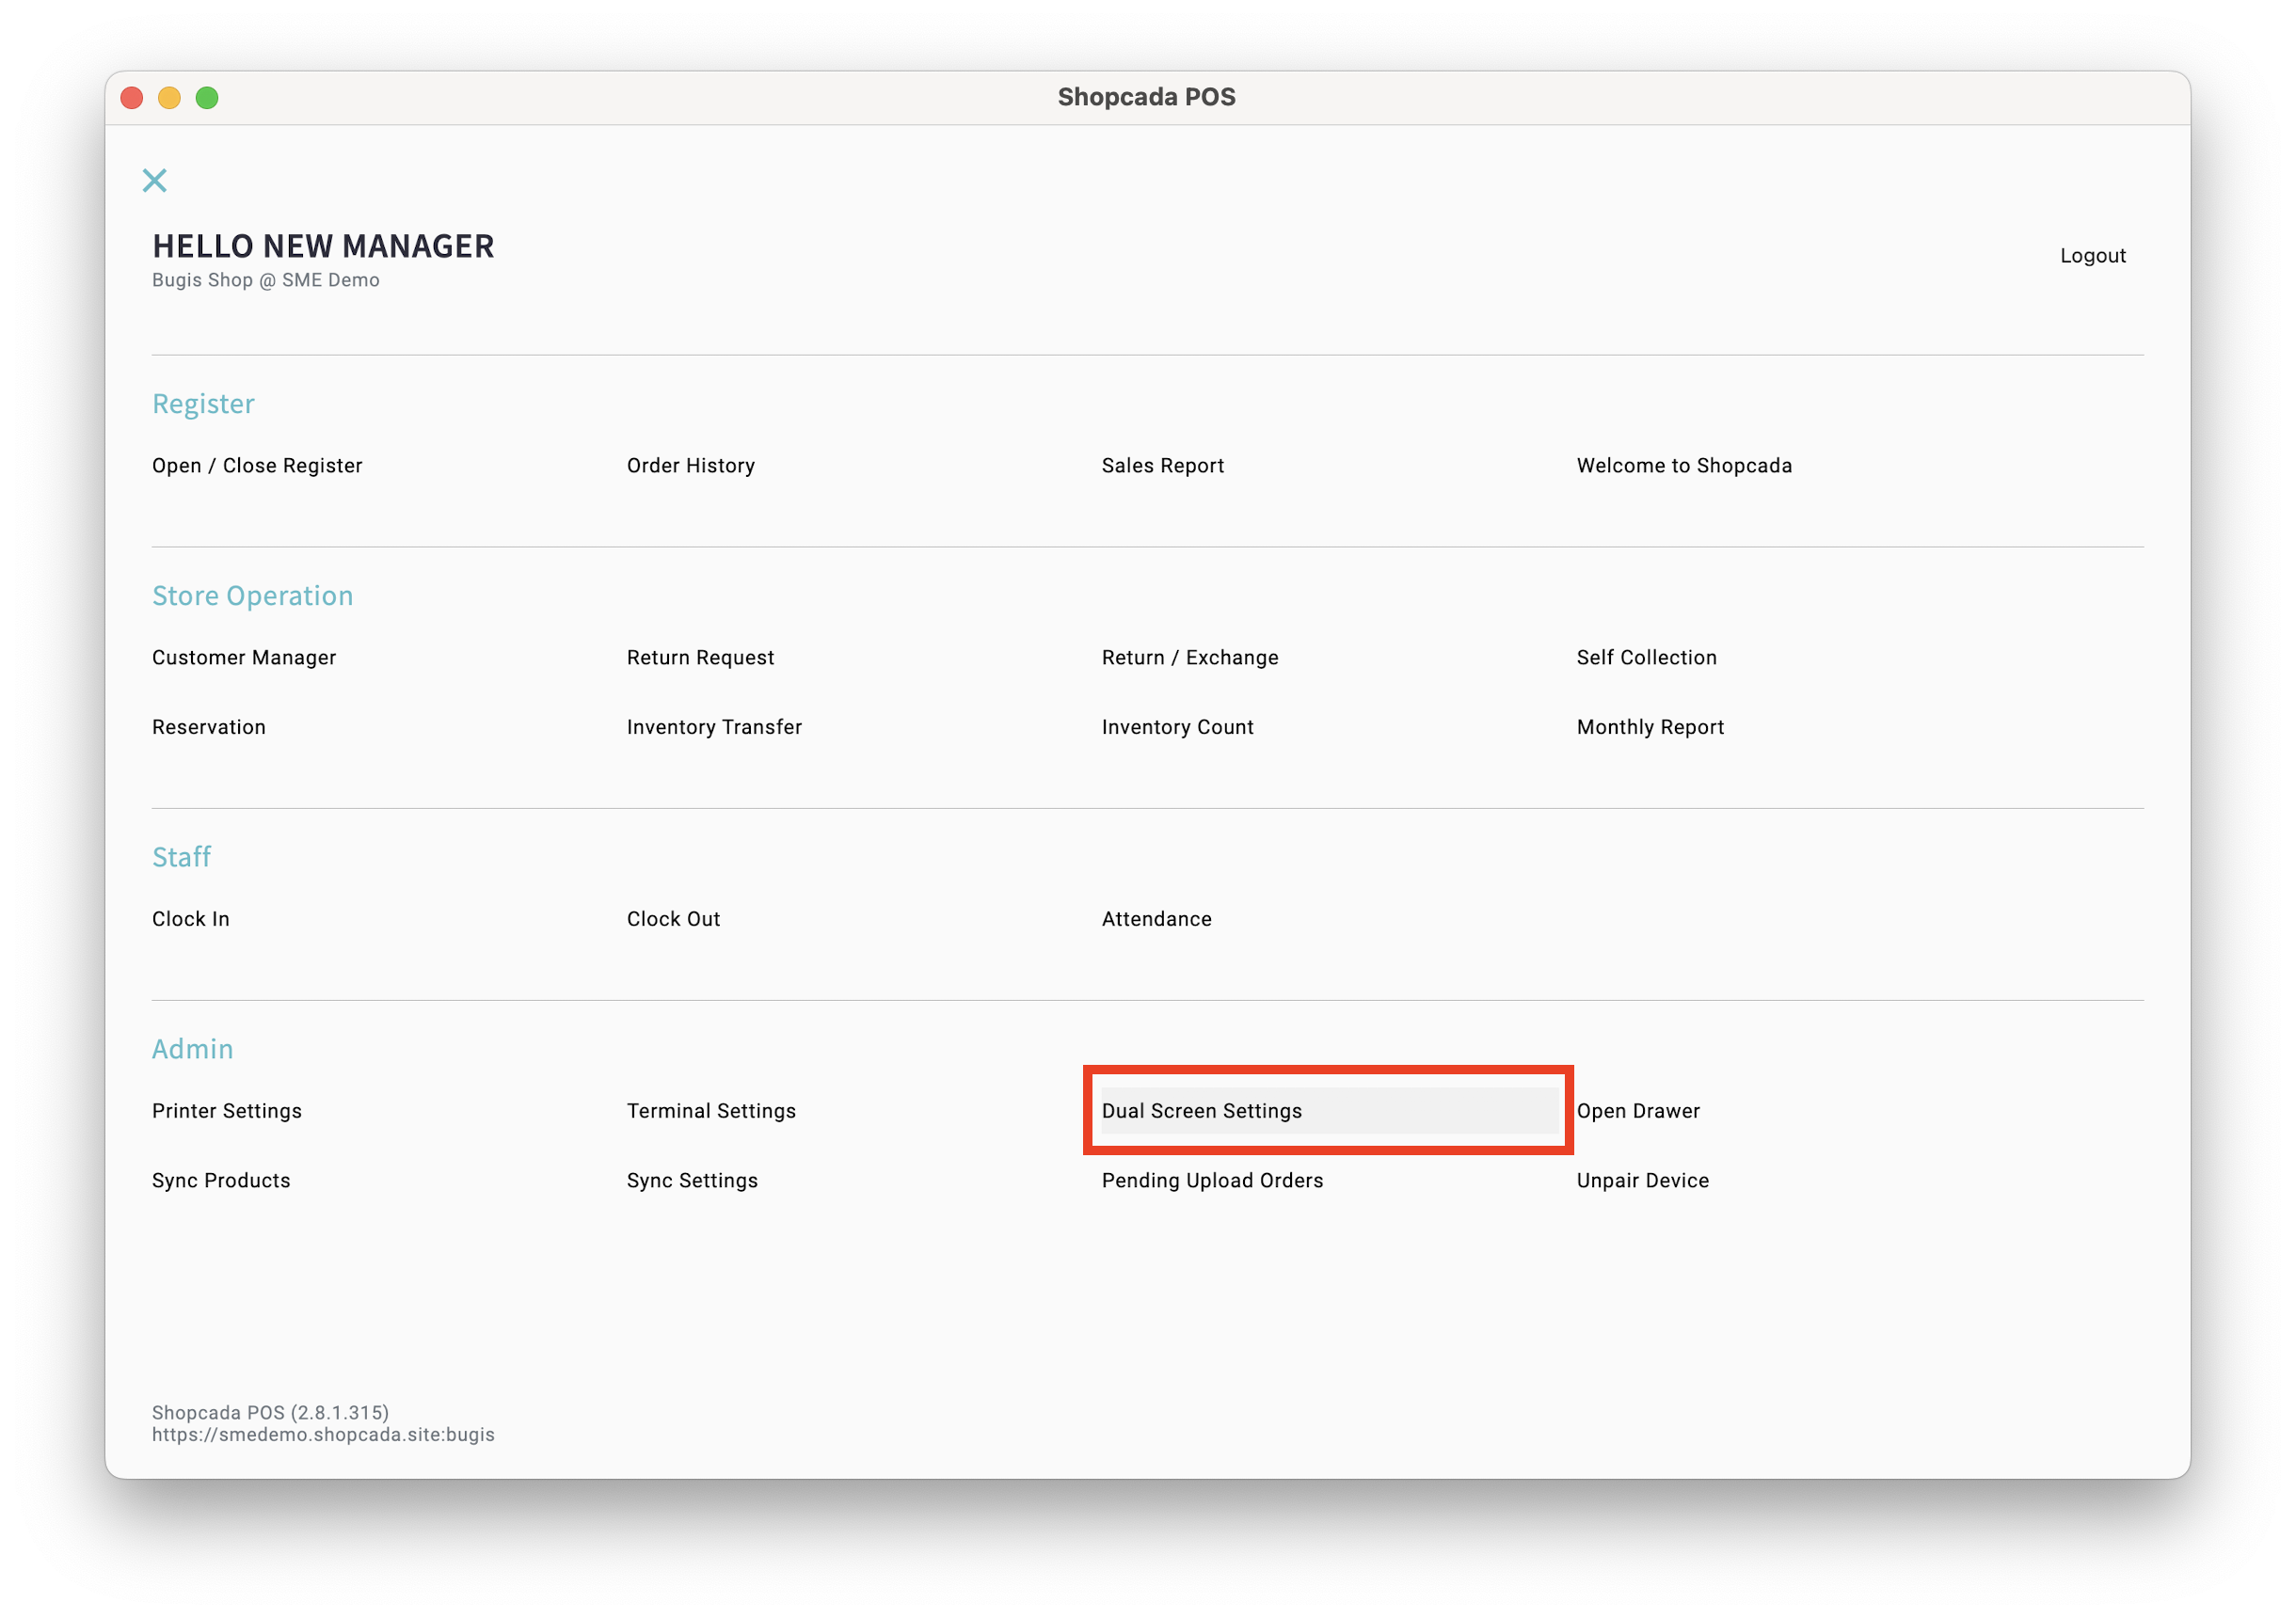
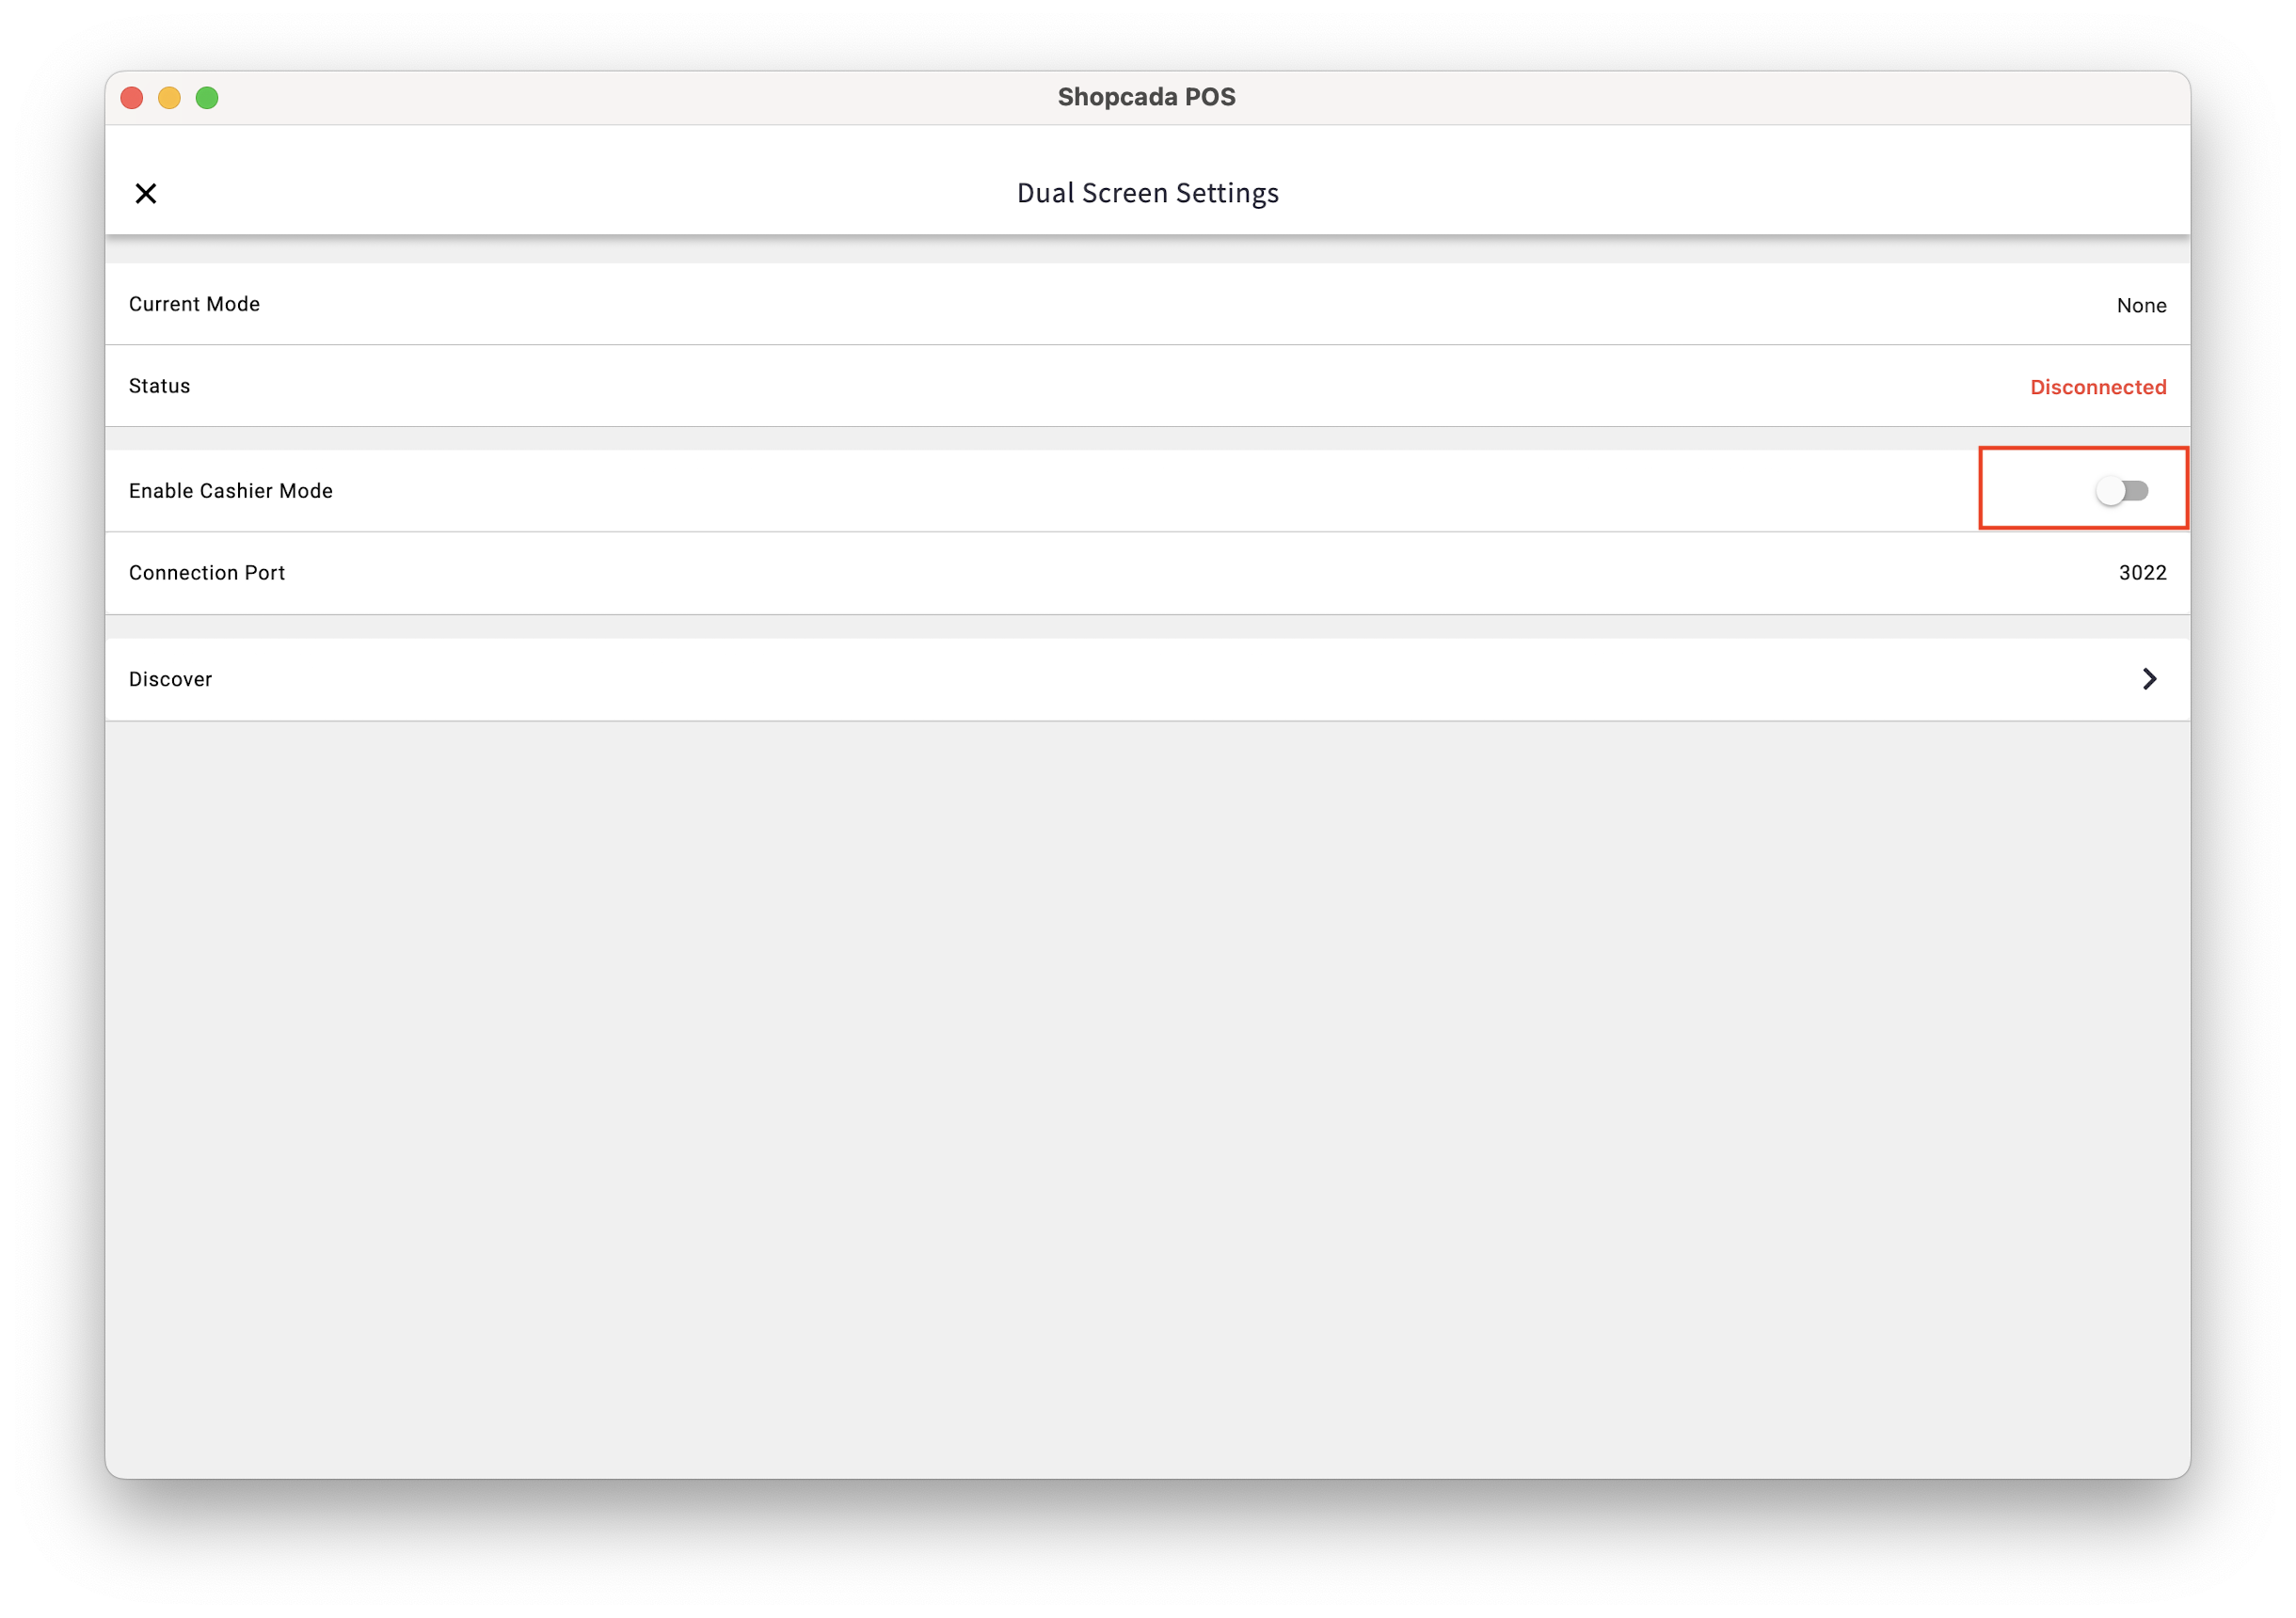
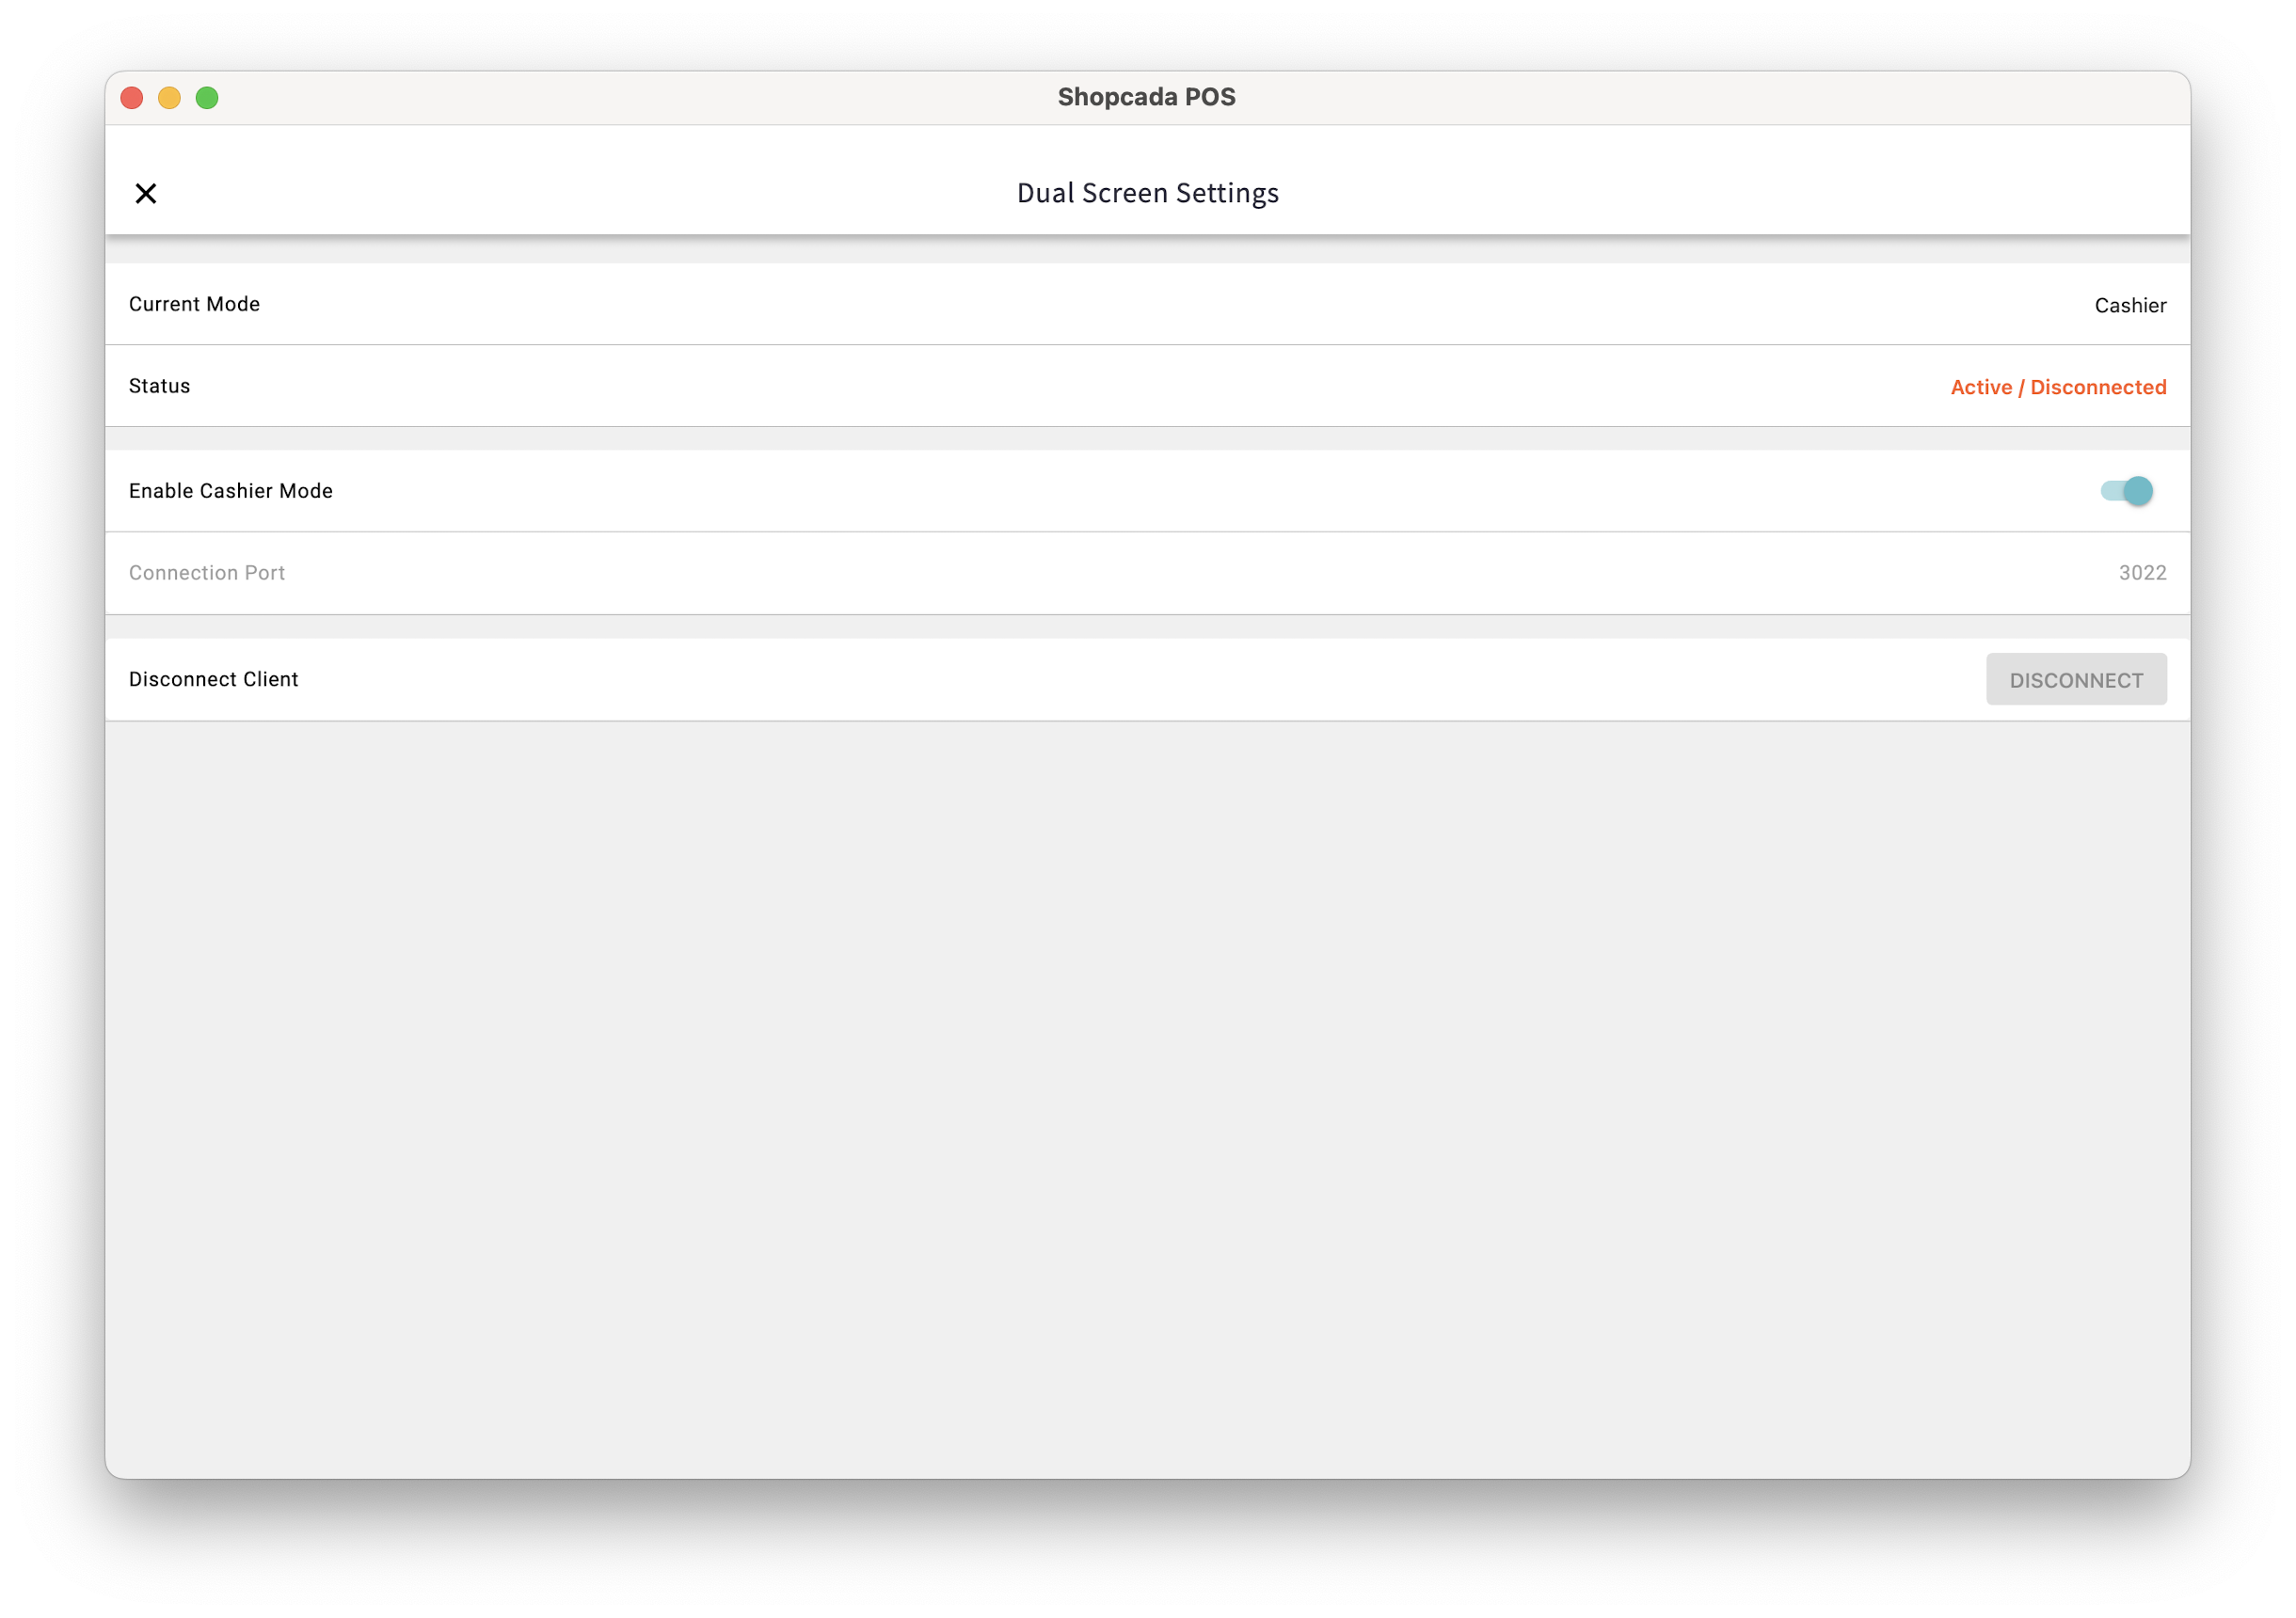
-
Go to POS Admin > Dual Screen Settings.
-
Under the Dual Screen Settings section, tap on Enable Cashier Mode
-
Make sure turn on successfully.
Setup the Customer Mode
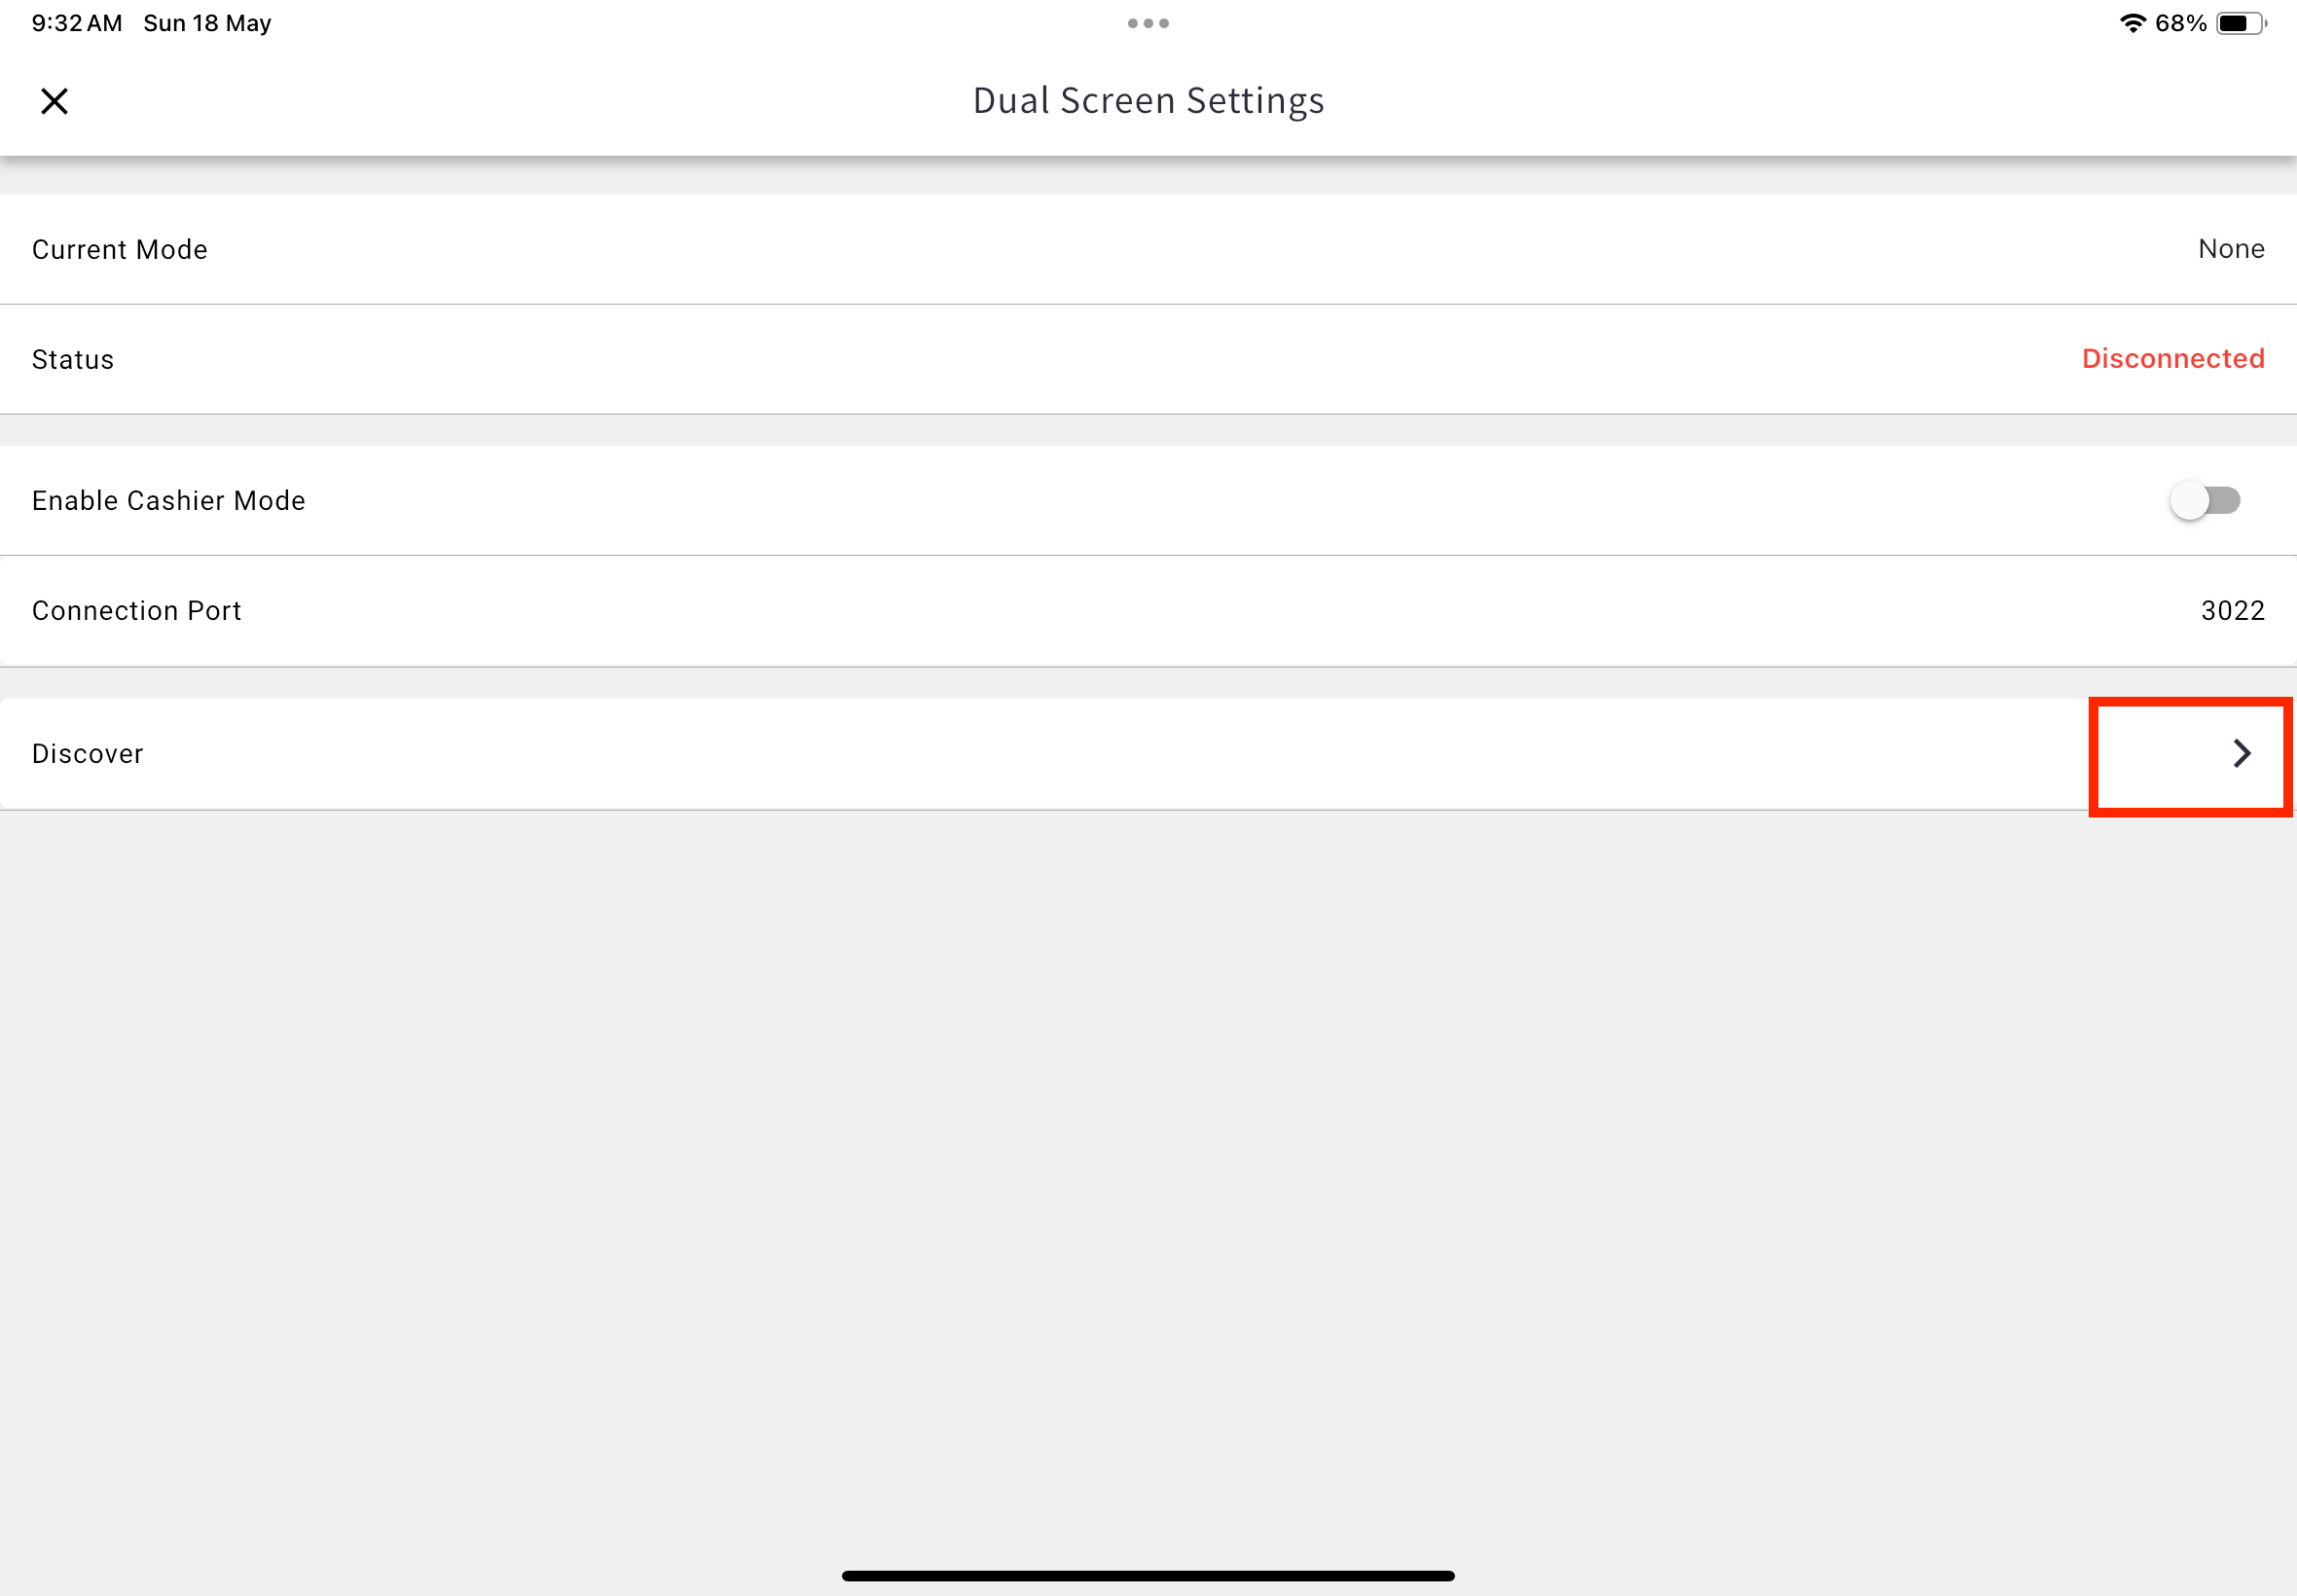
-
At the 2nd iPad, go to POS Admin > Dual Screen Settings.
-
Under the Dual Screen Settings section, tap on Discover
-
Once connection is done, the uploaded logo and banner will show at 2nd iPad
Cashier Mode iPad will show status Connected once the customer mode iPad is connected.
Customer Lookup
-
From the POS Customers Manager, tap icon for customer search.
-
Customers are prompted to enter their mobile number or email address
-
After clicking Search, the system attempts to find a matching customer profile.
-
Cashier to select the correct customer profile to tag to the order.
Create new customer record
-
From the POS Customers Manager, tap icon for customer to create profile.
-
The screen will prompt the customer to create a new account by enter the required details.
-
Once create created, cashier will tag the order to an order and complete checkout.
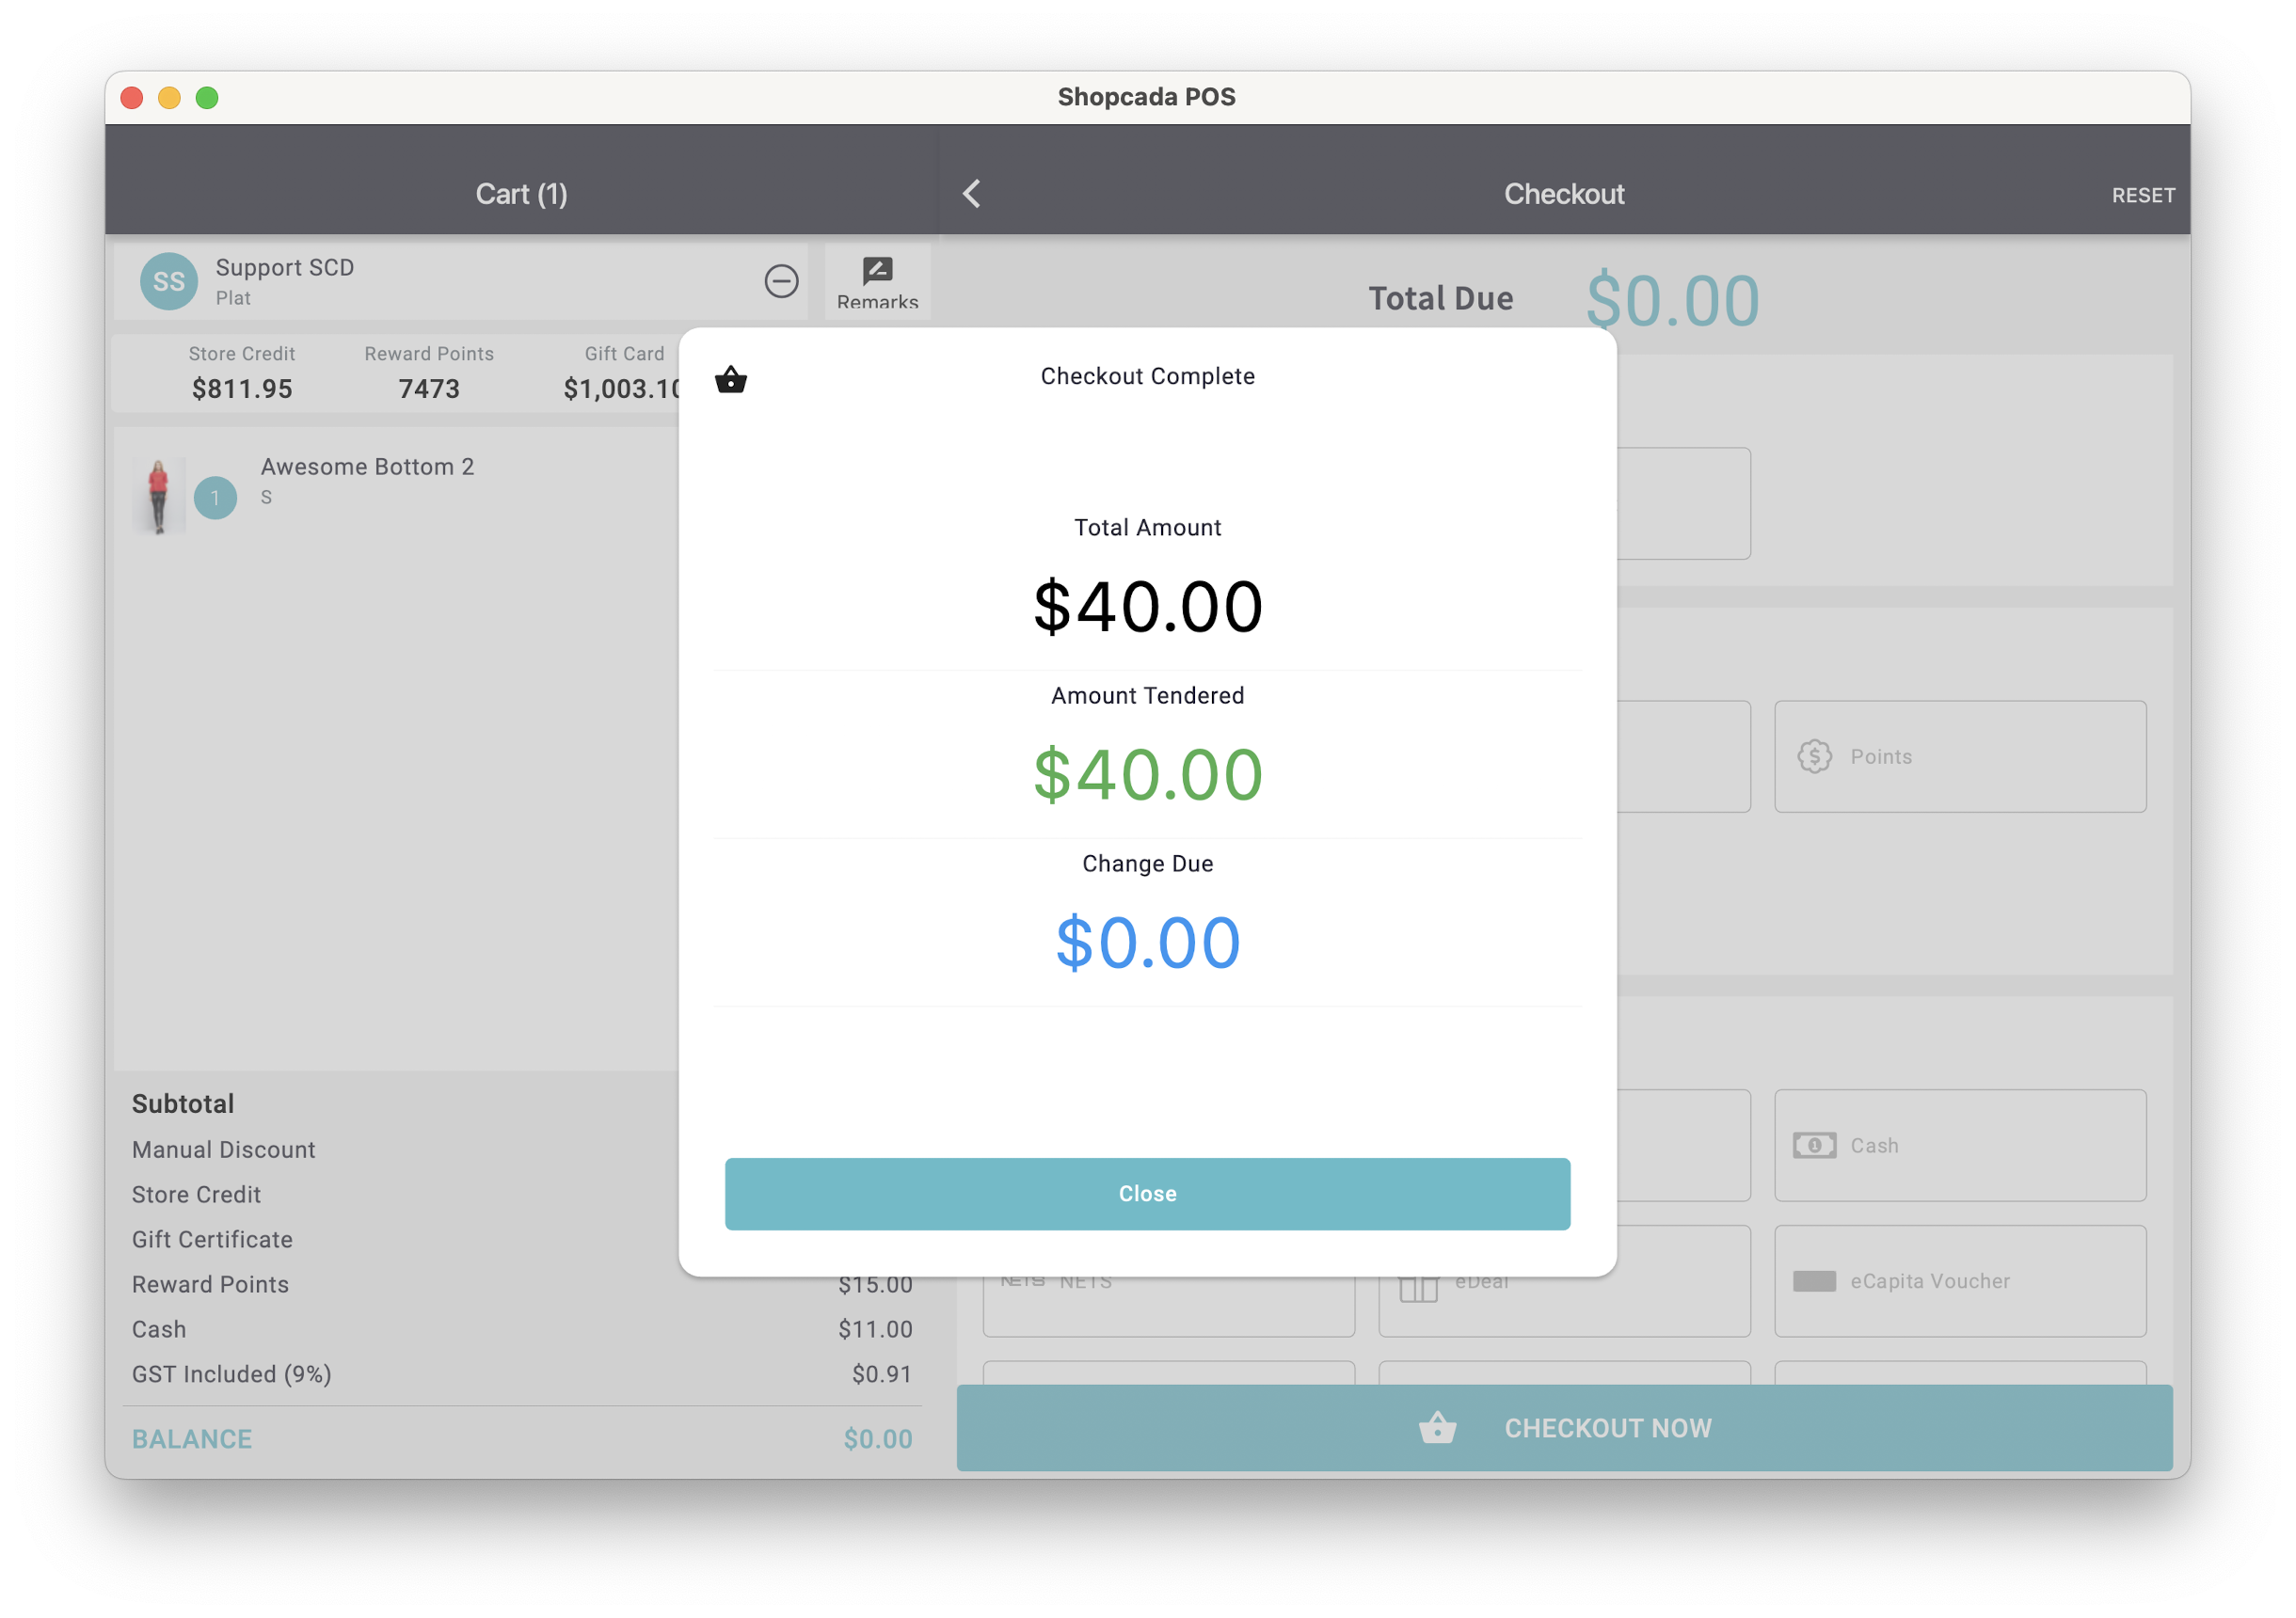
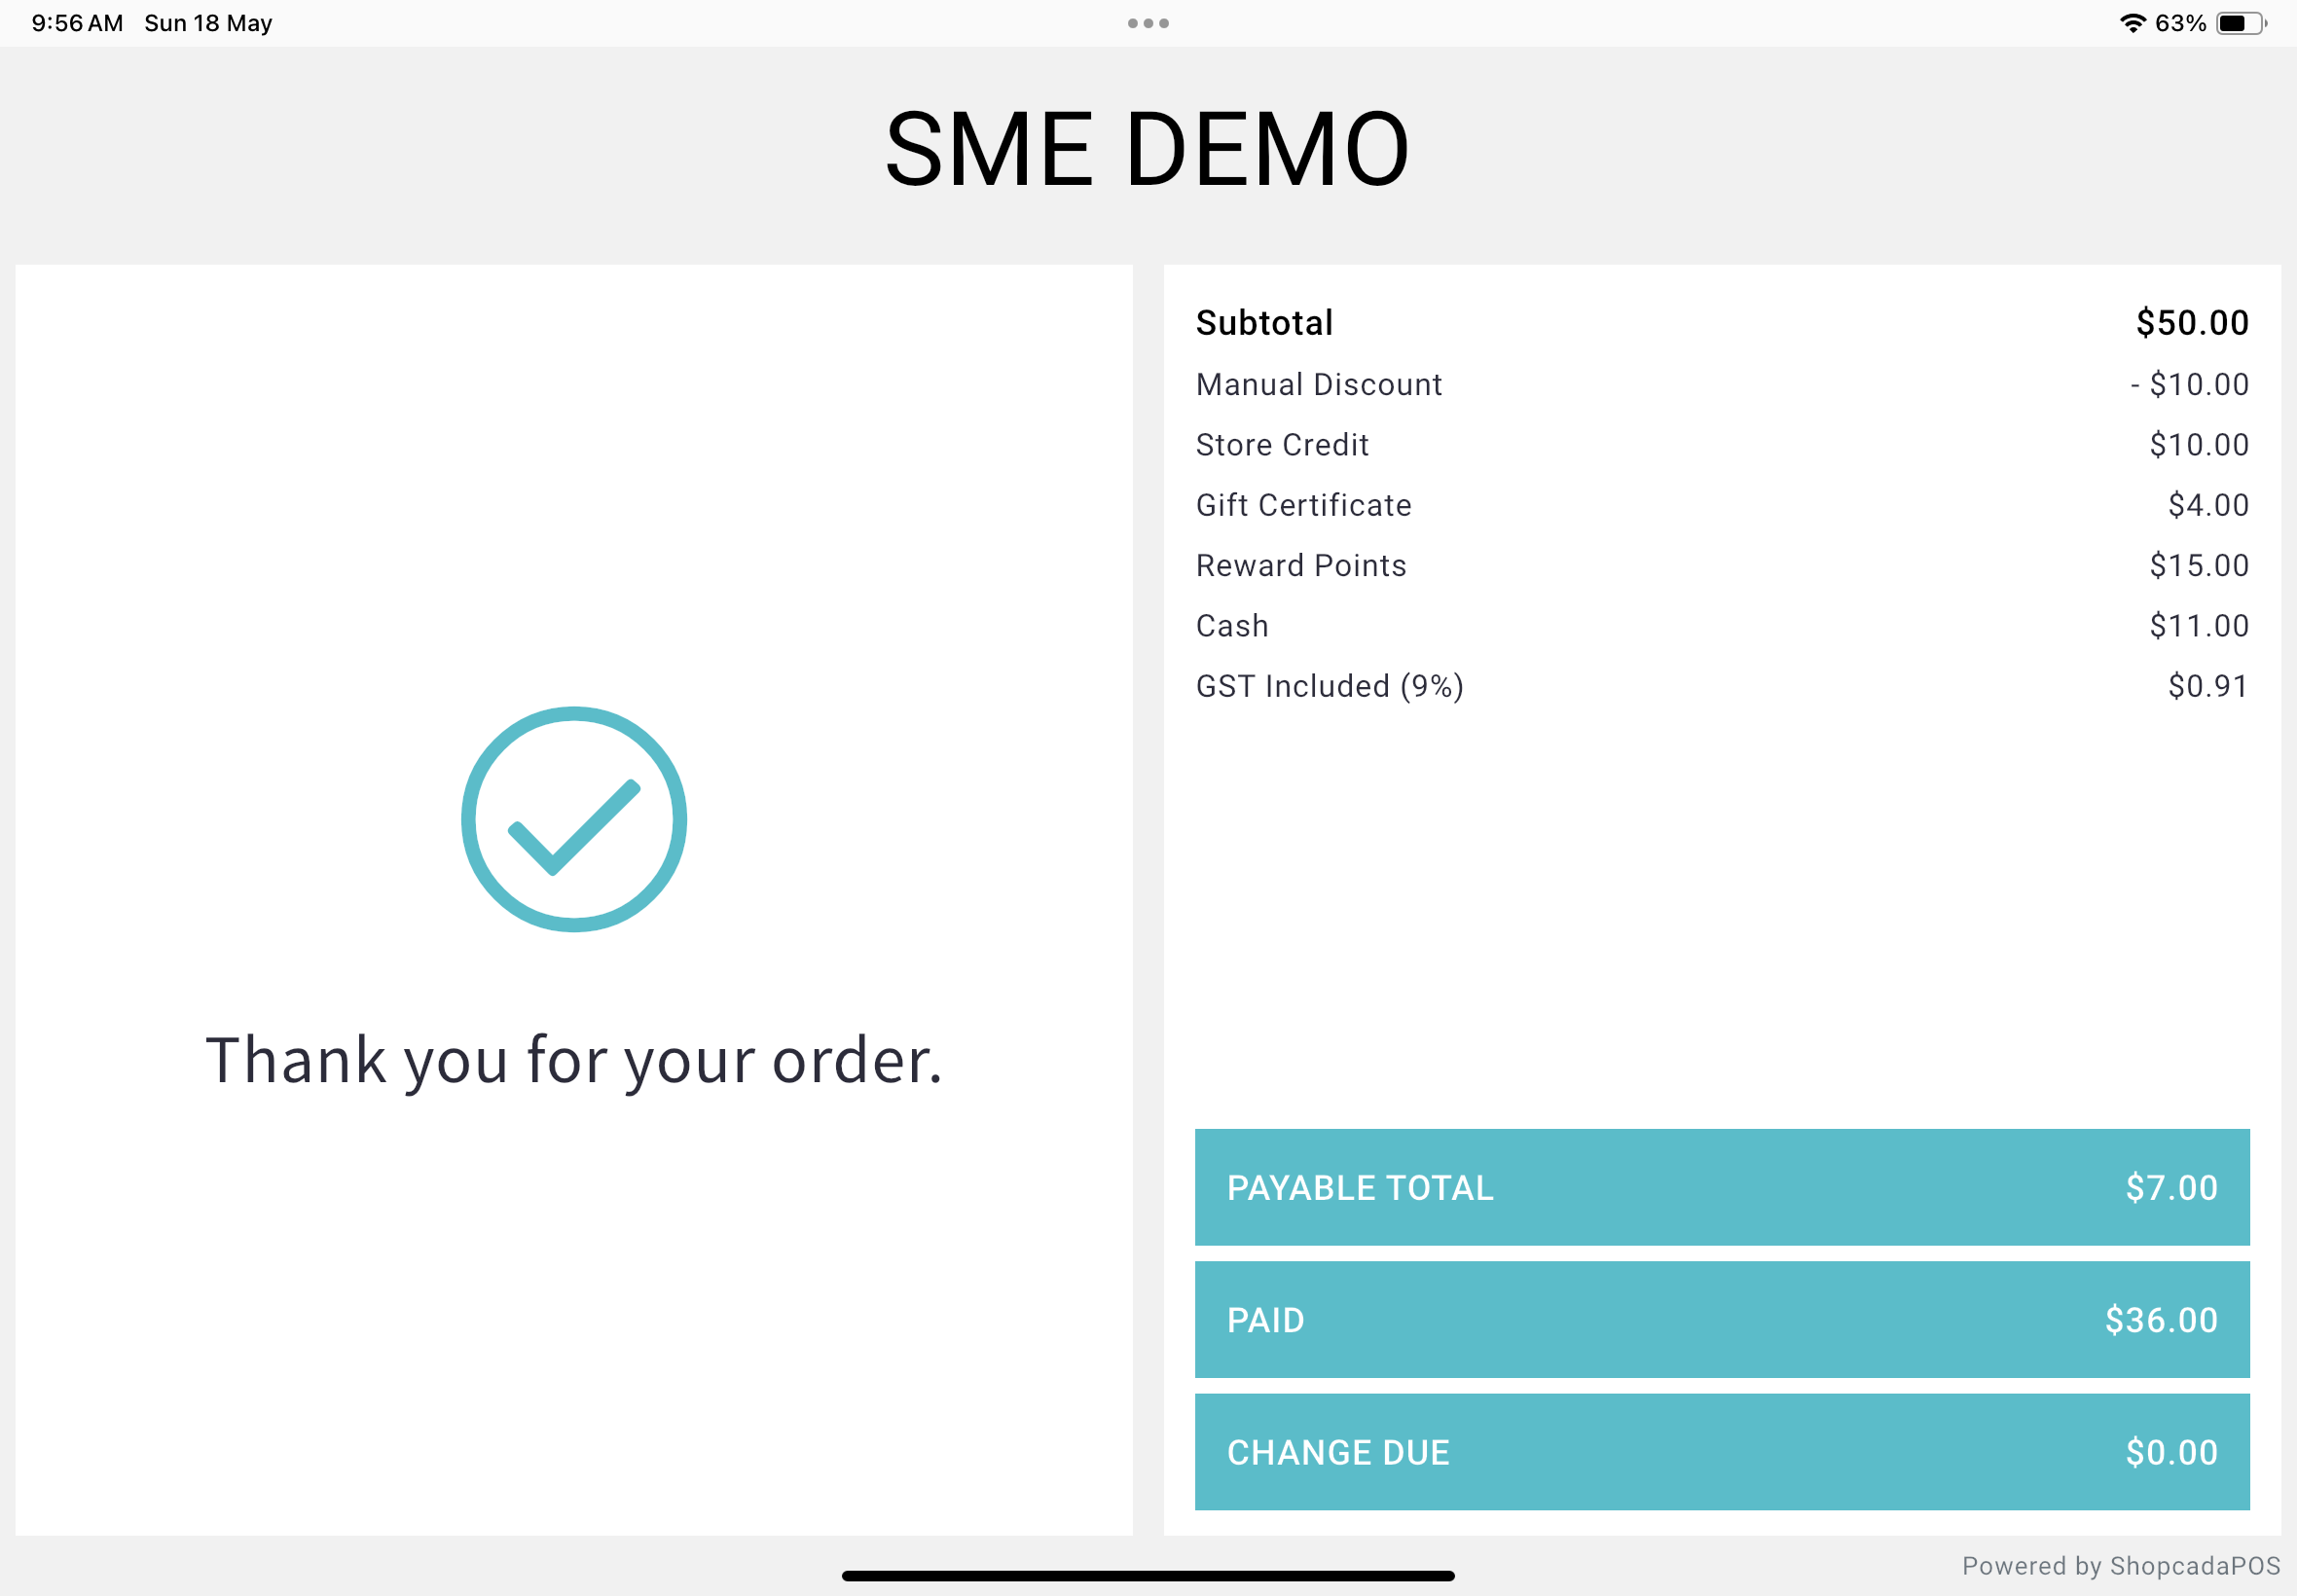
Checkout process
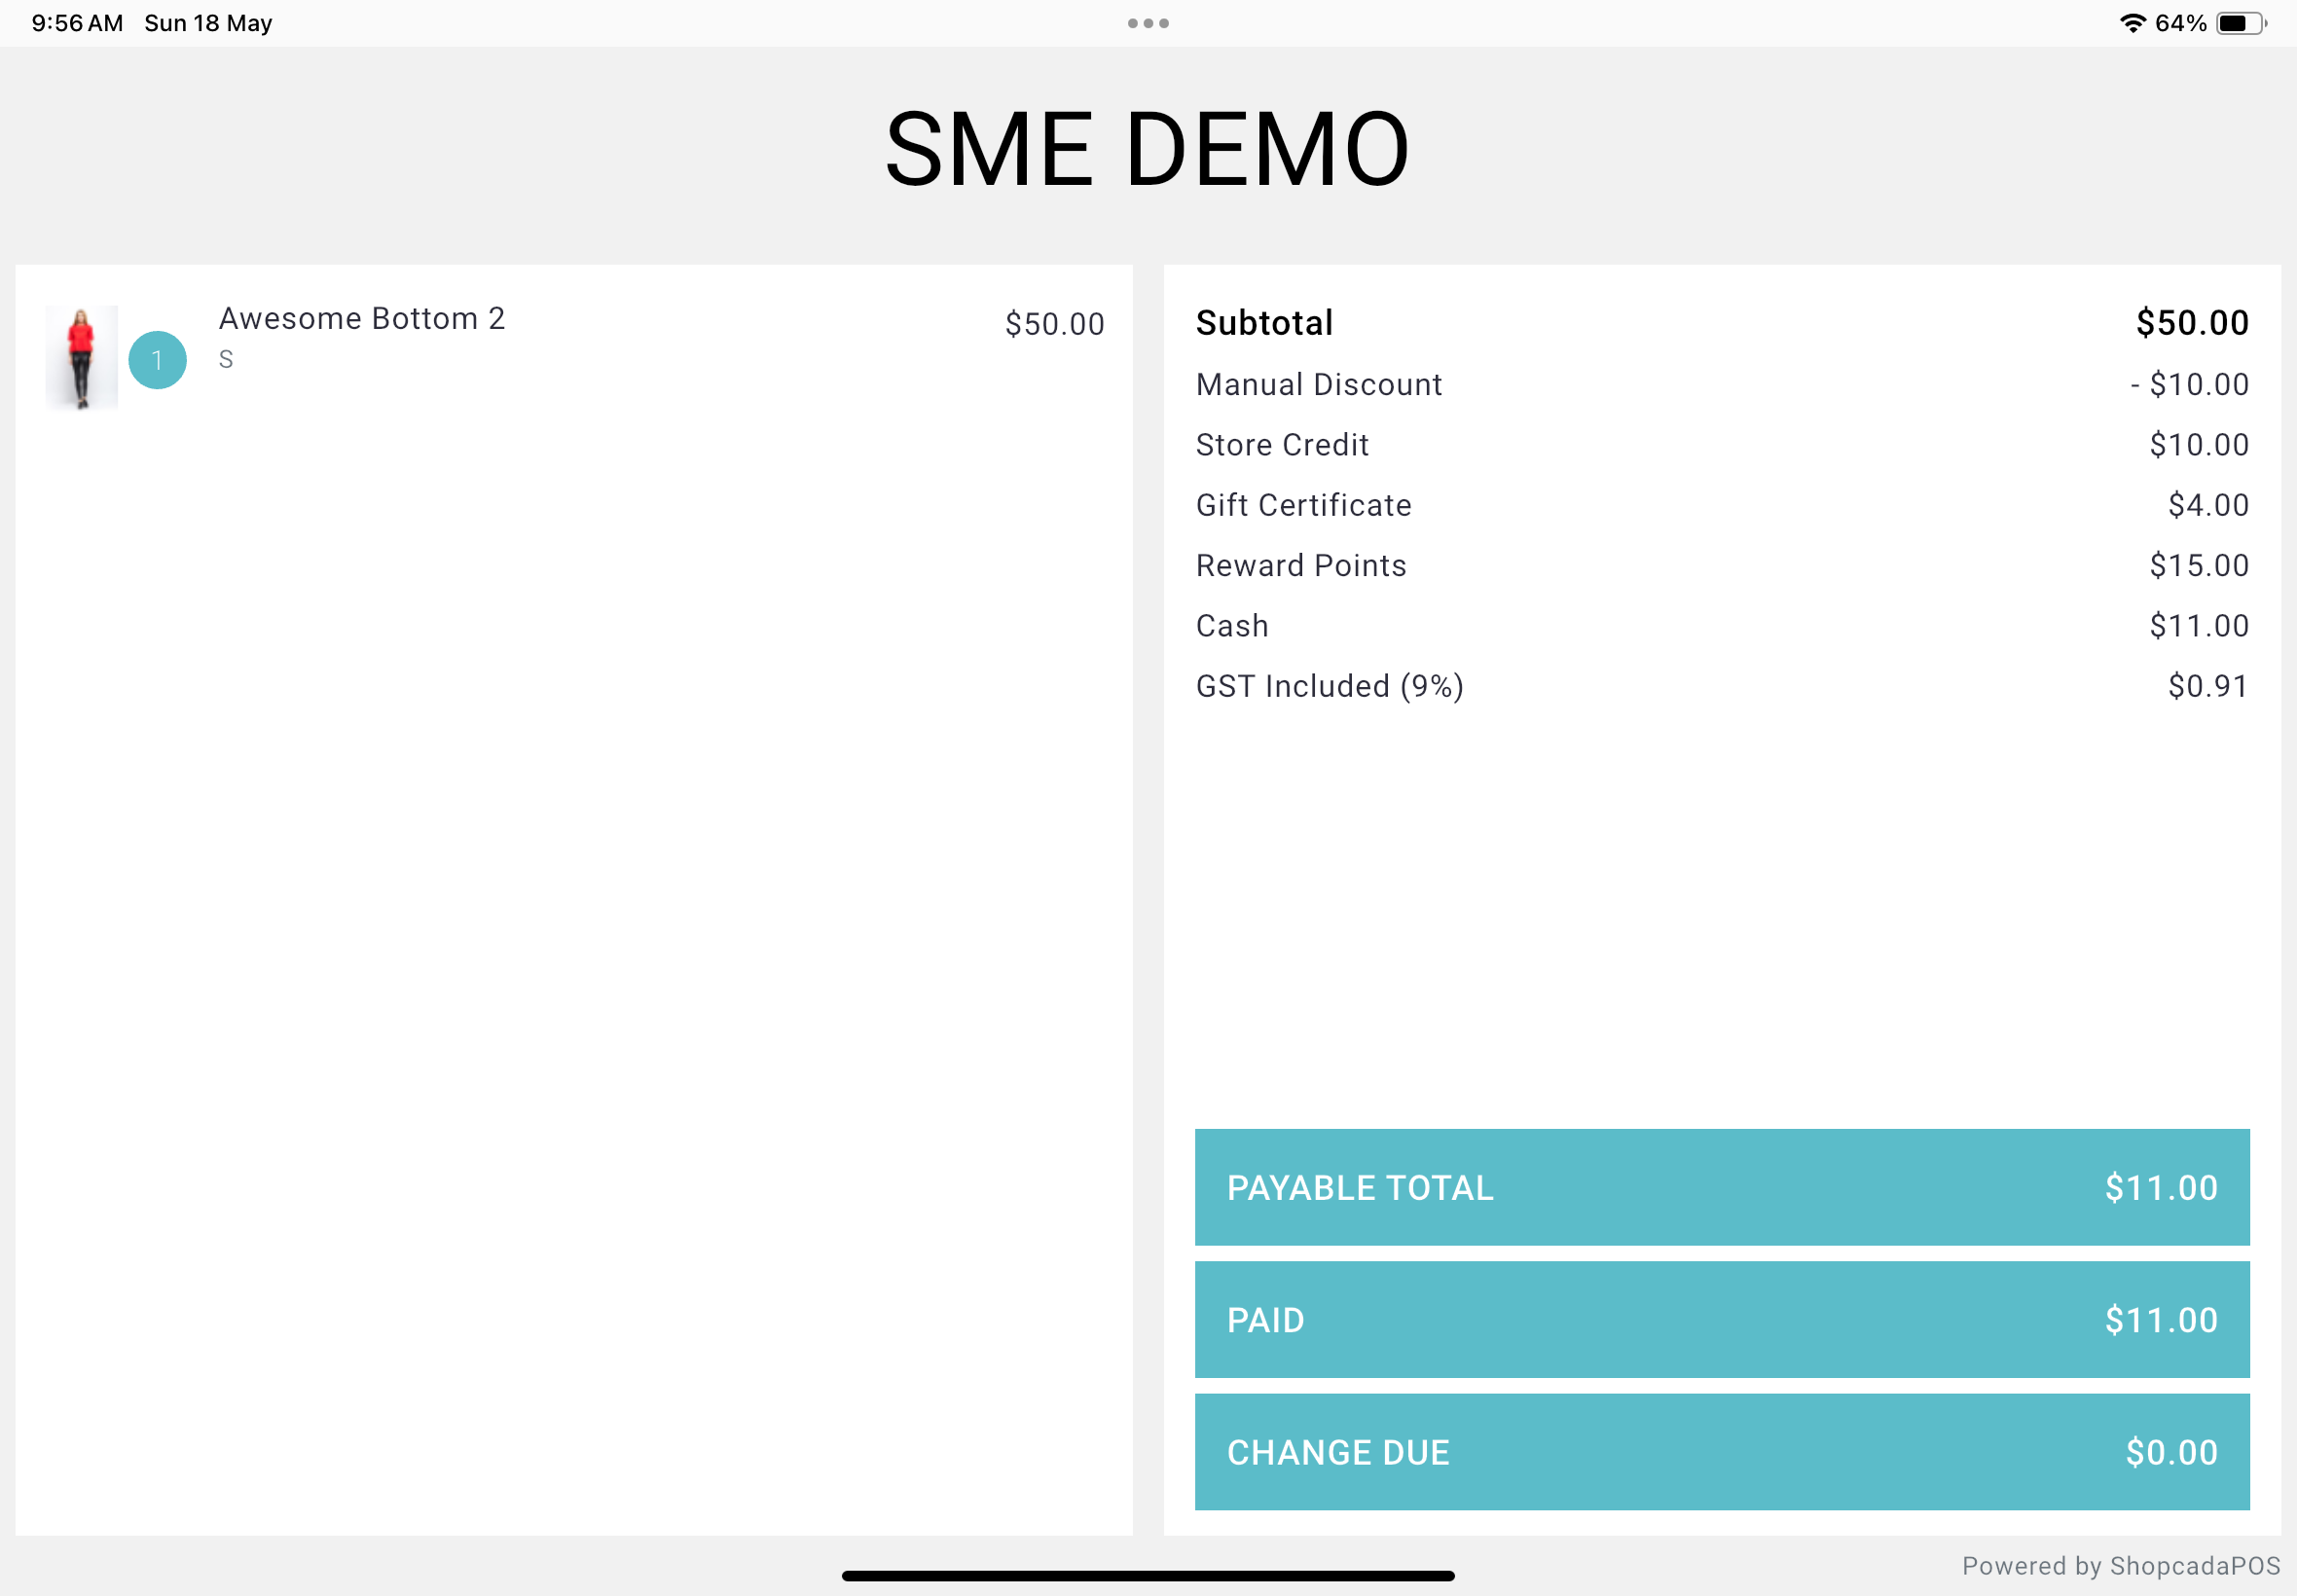
View Cart During Checkout
-
Once a product is added to the cart, it appears on the customer-facing screen.
-
This screen includes:
-
Product name
-
Variant (e.g., size)
-
Confirm & Proceed

-
When enter into checkout mode.
-
The cart payment details will show to customer:
-
Product name
-
Variant (e.g., size)
-
Price breakdown
-
Discount applied
-
Credit applied
-
Payment mode
-
Total payable amount
-
Change due, if applicable
-