


Seamlessly handle shipment creation and tracking through your Shopcada dashboard using the SPX integration.
Install the SPX Express Module
-
Navigate to Dashboard > App Store
-
Search for the SPX Express module and click Install
Configure SPX API Integration in Shopcada
-
Navigate to Dashboard > Settings > Orders > Carriers Settings.
-
Select SPX Express and click Configure.
-
Fill in the following details for SPX API Setting:
-
System Environment - select Production
-
SPX Express User ID*
-
SPX Express Secret Key*
* Navigate to the MY PROFILE section of your SPX Express dashboard to retrieve your User ID and Secret Key.
-
-
Fill in the following details for Service Setting
-
Need Insurance
-
Delivery Instruction
-
Parcel Item Name
-
-
Fill in the following details for Package Pickup Address:
-
Name
-
Postal Code
-
Street Address
-
Country/Region
-
City
-
Email
-
Contact Number
-
-
Click Save to apply the settings.
*Please approach SPX Express for the required details.
Set Up Shipment Notifications
-
Navigate to Dashboard > Settings > Emails > Email List.
-
Under Order Fulfilment, enable the following notifications:
-
Shipment Notification - SPX Express - At Shipper: Sent when SPX Express picks up the parcel from your warehouse.
-
Shipment Notification - SPX Express - Shipped: Sent whenSPX Express delivers the parcel to the customer.
-
To include tracking information in these emails, insert the token [package-tracking-number] into the email template.
Create Package for Individual Order
-
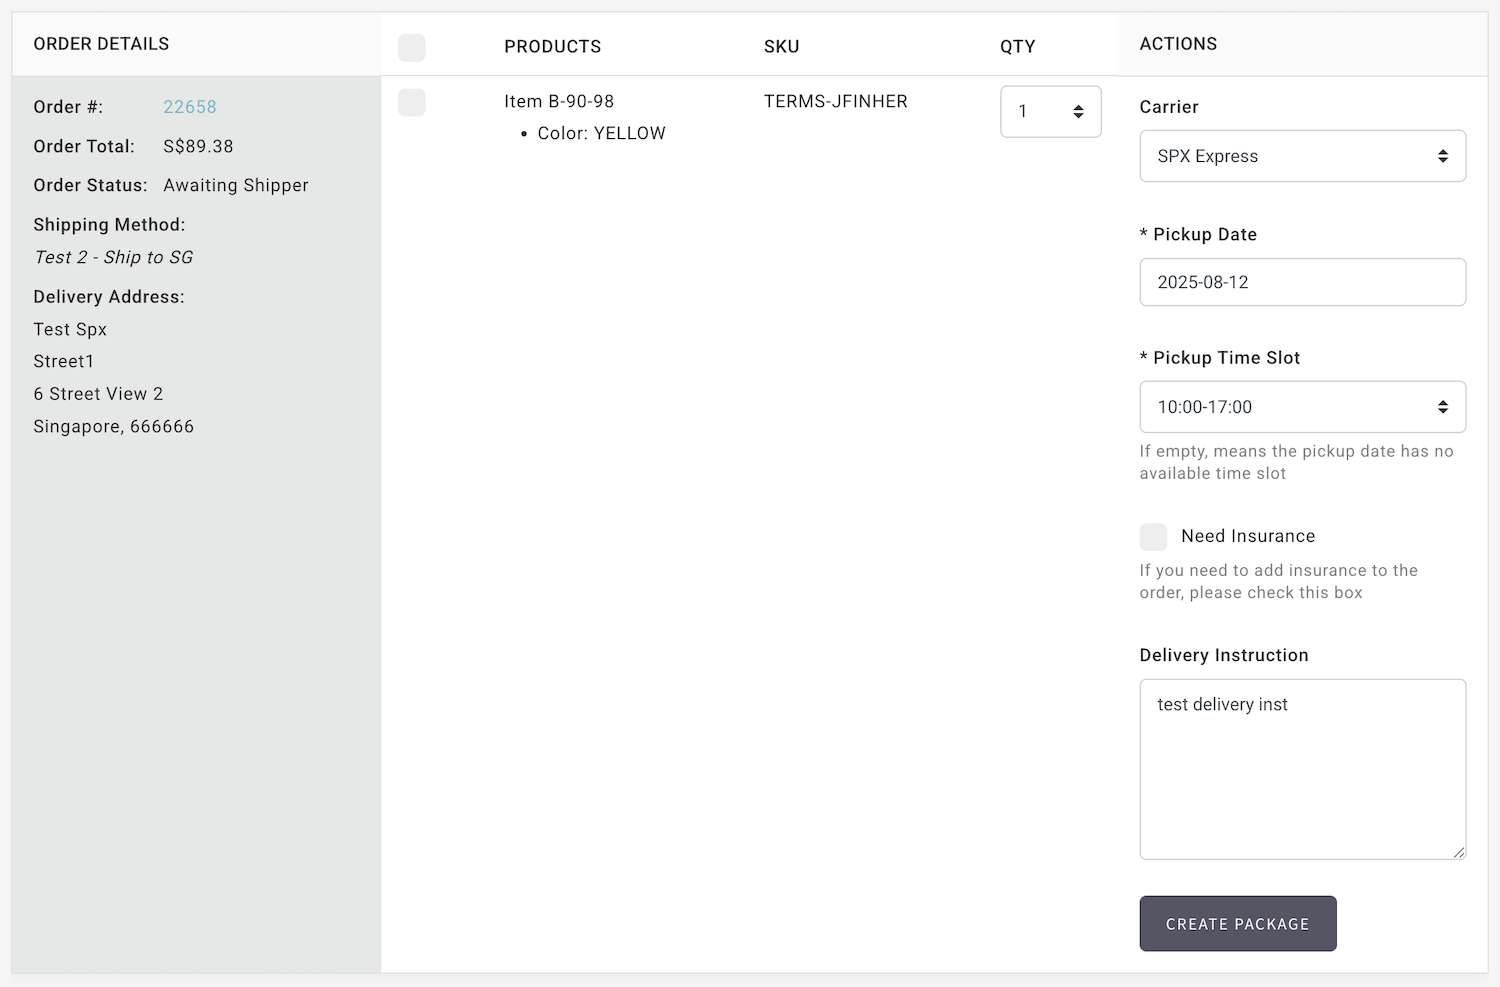
Navigate to Dashboard > Orders > Fulfil Orders.
-
Apply filters to locate the desired order.
-
Select the items to be shipped.
-
Choose SPX Express from the Carrier list.
-
Select the Pick Up Date, Pick Up Time Slot
-
Check Need Insurance, if needed
-
Fill in / edit Delivery Instruction if different from default message
-
Click Create Package. The shipment will be created automatically in the SPX Express portal.
-
Customers will receive notifications as the parcel progresses through the delivery process.
Create Packages in Batch
-
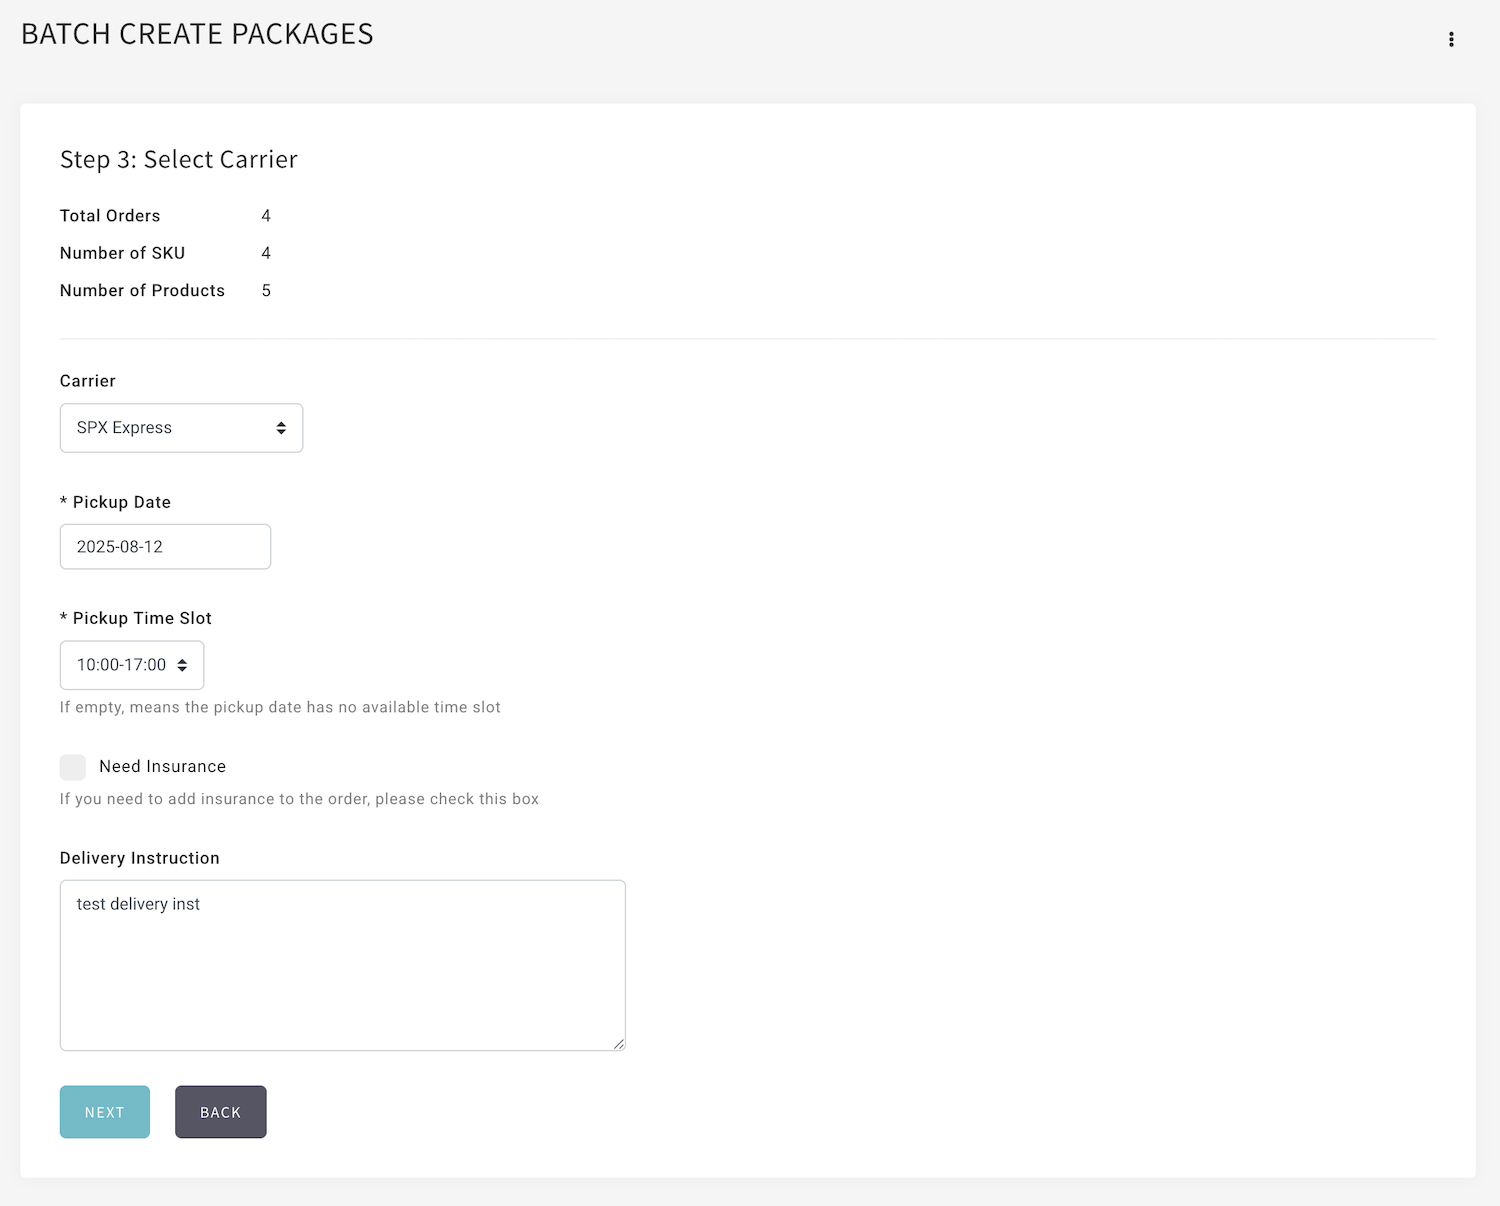
Navigate to Dashboard > Orders > Fulfil Orders.
-
Click on the vertical ellipsis and select Batch Create Packages.
-
Process your packages as usual.
-
At Step 3: Select Carrier, choose SPX Express from the list.
-
Select the Pick Up Date, Pick Up Time Slot
-
Check Need Insurance, if needed
-
Fill in / edit Delivery Instruction if different from default message
-
Click Create Package. Shipments will be created automatically in the SPX Express portal.
-
Customers will be notified as their parcels are processed and delivered.
