


Overview
Print a product label at the counter from the Shopcada POS app, for example when an item is re-priced or has lost its tag.
To print many labels at once from the Shopcada dashboard, see How To Print Barcode for Shopcada POS.
Before You Start
You need:
- A Brother QL-820NWB label printer. Connected over Wi-Fi, wired LAN or Bluetooth only.
- Brother QL label paper that matches the template you will use. See Choose the Right Template.
- Label printing turned on in the Shopcada dashboard. See Turn On Label Printing.
- An internet connection, so the app can load the label templates from Shopcada.
Turn On Label Printing
HQ turns label printing on once for your store. Your dashboard user group needs the Configure Store permission to access this setting.
- Navigate to Dashboard > POS > Settings.
- Go to the General section.
- Tick Enable Product Label Printing from POS.
- Click Save configuration.
Then update each iPad:
- In the Shopcada POS app, open the menu.
- Under Admin, tap Sync Settings.
- Close the app and open it again, so it loads the label templates.
Do this on every iPad that will print labels. After the sync, Label Printer Settings appears under Admin, and a Print Label button appears on each product page.
Connect the Printer
Connect the printer once on each iPad. The app remembers it, and reconnects to it each time the app starts.
Turn on the printer before you open the app.
First, connect the printer to the iPad:
- For Wi-Fi or LAN, connect the printer to the same network as the iPad.
- For Bluetooth, turn on Bluetooth on the printer, then pair it in the iPad’s Settings > Bluetooth.
Then, in the Shopcada POS app:
- Open the menu.
- Under Admin, tap Label Printer Settings.
- Tap Detect Printers.
- Under SELECT PRINTER, tap the QL-820NWB.
- Tap TEST CONNECTION. The app shows Printer connection successfully established.
To check the paper and print quality, tap TEST PRINT. The printer prints a sample label, using the first template in the list.
Print a Label
- Find the product.
- Long-tap the product to open its product page.
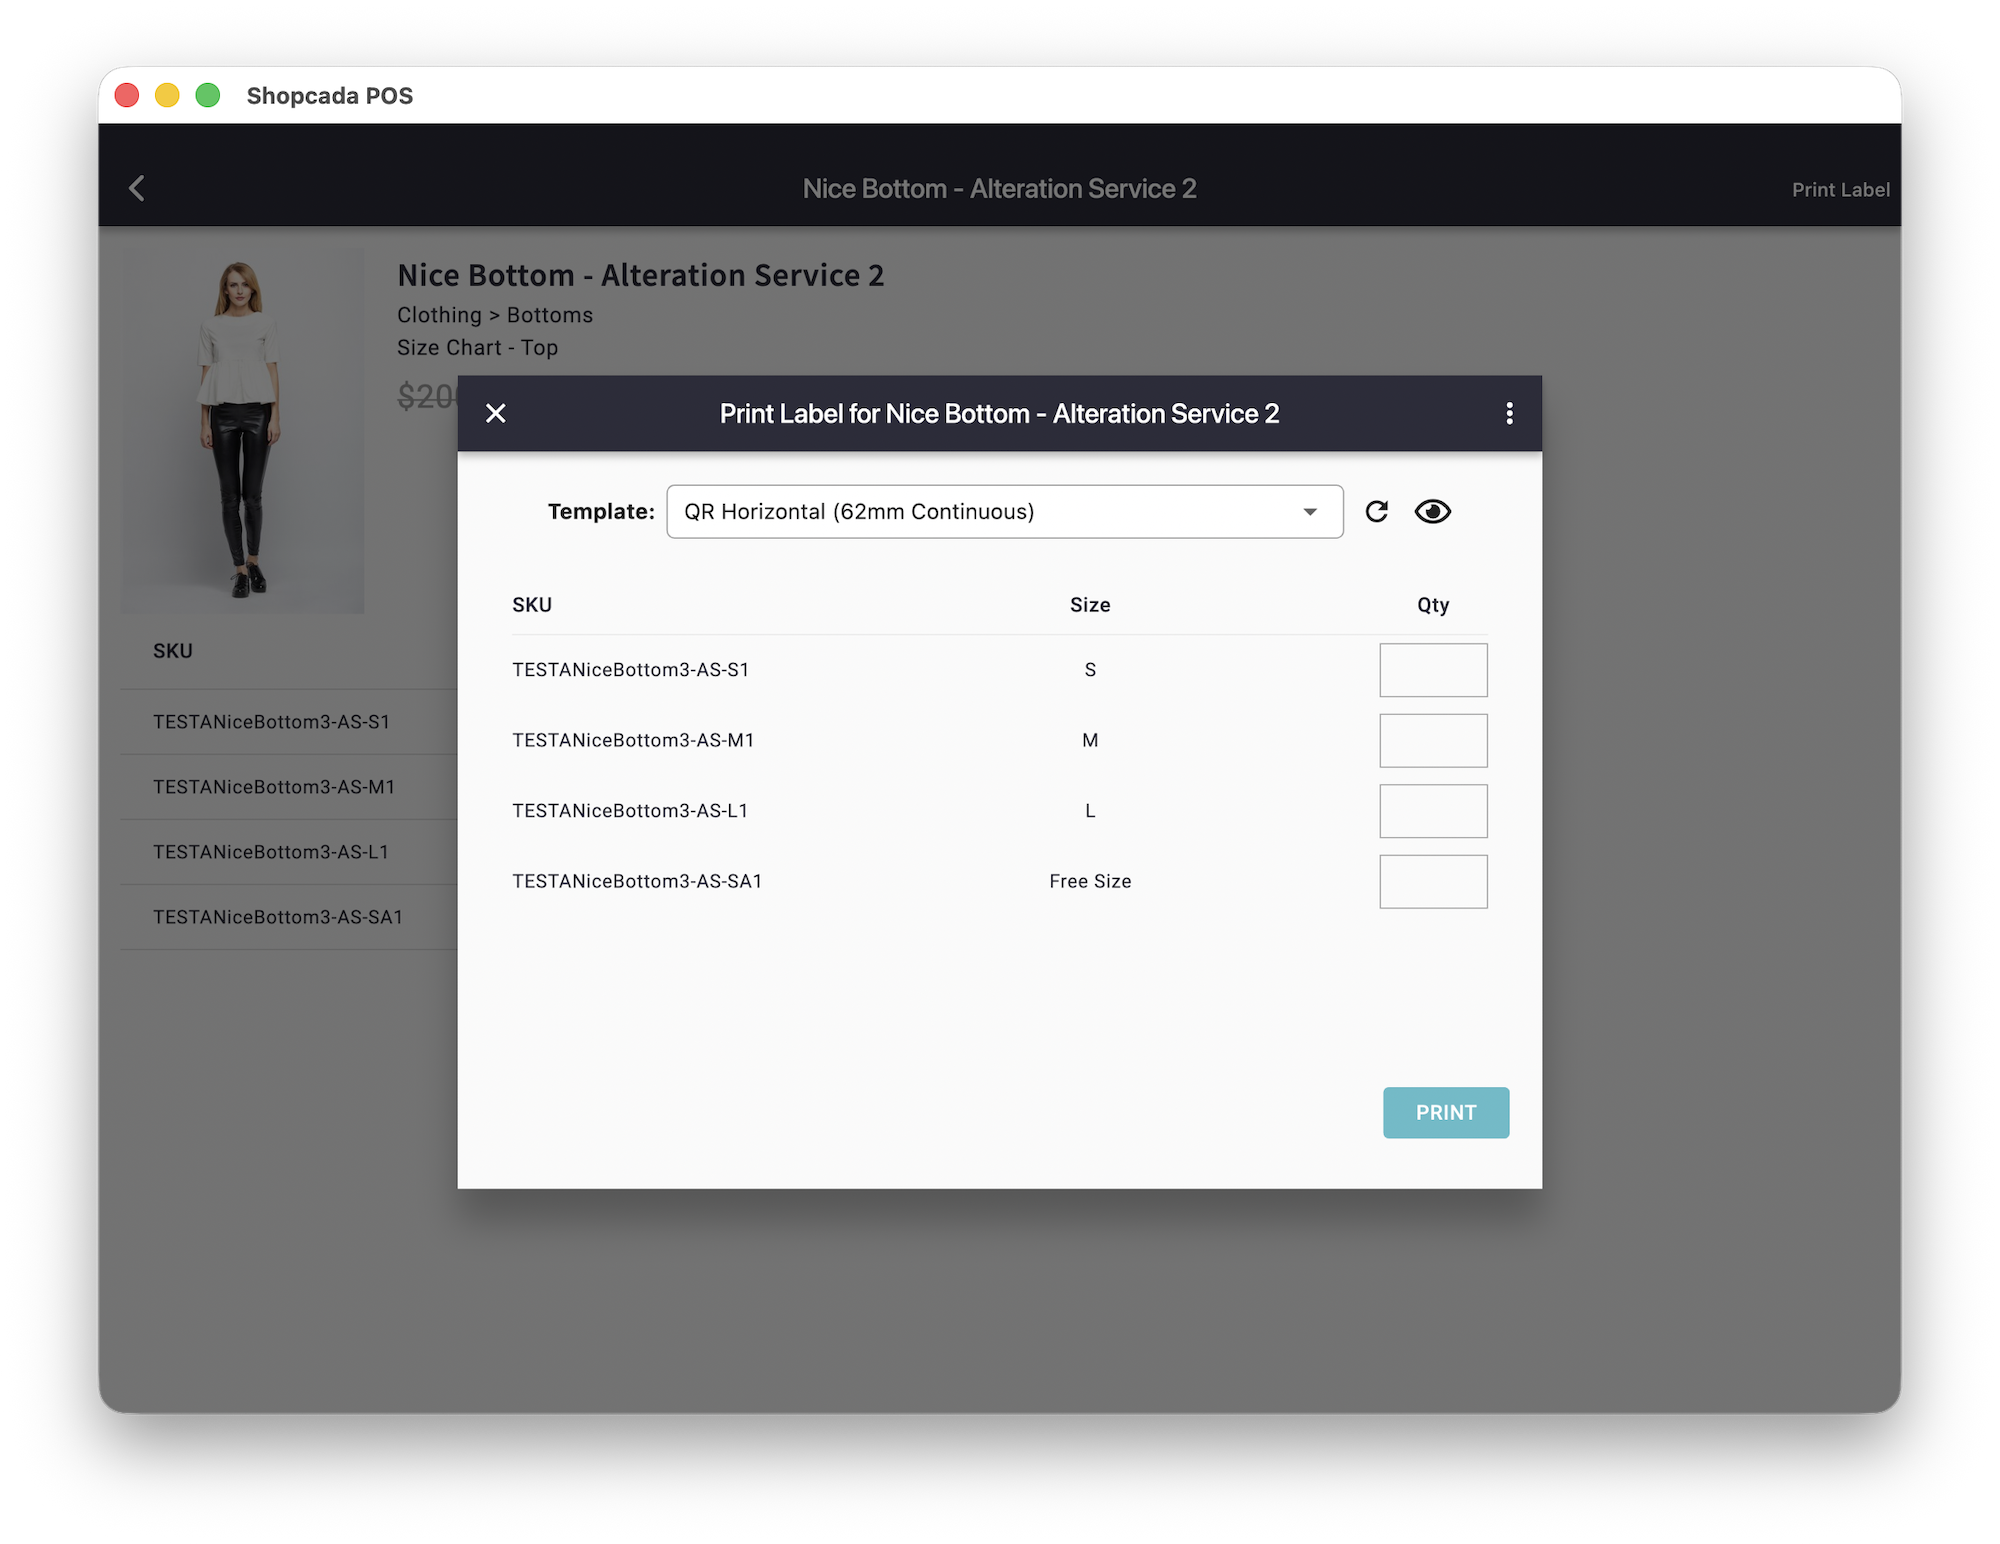
- Tap Print Label at the top right. The Print Label for {product name} window opens.
- In Template, choose the template for the paper in the printer. See Choose the Right Template.
- In Qty, enter the number of labels for each SKU you want to print.
- To check the label first, tap the eye icon. The preview shows the first SKU only.
- Tap PRINT.
Leave Qty blank for the SKUs you do not need.
You cannot close the window until printing ends.
To stop printing, tap CANCEL.
The app remembers the template you last printed with, even after the app is closed.
Choose the Right Template
The template must match the paper loaded in the printer. If it does not, nothing prints. See Troubleshooting.
Each template name ends with the paper size in brackets.
| Paper in the printer | Templates |
|---|---|
| 62mm continuous roll, including the red and black roll | Barcode (62mm Continuous), QR Horizontal (62mm Continuous), QR Vertical (62mm Continuous), QR Small (62mm Continuous) |
| 29mm continuous roll | QR Vertical (29mm Continuous), QR Small (29mm Continuous), QR 40x29 (29mm Continuous) |
| 17mm x 54mm die-cut labels | Barcode (17mm x 54mm), QR Horizontal (17mm x 54mm), QR Vertical (17mm x 54mm) |
| 62mm x 29mm die-cut labels | Barcode (62mm x 29mm), QR Horizontal (62mm x 29mm), QR Vertical (62mm x 29mm) |
| 29mm x 90mm die-cut labels | Barcode (29mm x 90mm), QR Horizontal (29mm x 90mm), QR Vertical (29mm x 90mm) |
The first part of the template name is the layout.
| Layout | Description |
|---|---|
| Barcode | Barcode, product name and price. |
| QR Horizontal | QR code, product name, SKU and price. |
| QR Vertical | Product name, options (for example size and colour), price and QR code. |
| QR Small | QR code, price and product name. |
| QR 40x29 | QR code with the SKU under it, price and product name. |
The barcode and QR code hold the product’s barcode, or its SKU if the product has no barcode.
The price on the label is the product’s Sell Price, in the outlet’s currency. It does not include discounts given at checkout.
For another label size or layout, email support@shopcada.com.
Troubleshooting
| Problem | What to do |
|---|---|
| Label Printer Settings or the Print Label button is missing | Check that Enable Product Label Printing from POS is ticked in Dashboard > POS > Settings. On the iPad, tap Sync Settings under Admin. |
| Template shows No Templates, or the app shows No template selected. | The templates have not loaded. Check that the iPad is online. Tap the refresh icon next to Template. If the list is still empty, close the app and open it again. |
| Print failed for {SKU}. Exception: LP0006: Incompatible paper size detected. Please load a label size that matches the template requirements. | The template does not match the paper in the printer. Choose the template for the loaded paper, or load the paper the template needs. See Choose the Right Template. |
| Print failed for {SKU}. Exception: LP0003: Cannot determine paper size. Please check whether paper roll is QL compatible. | The printer cannot read the paper. Use genuine Brother QL paper, and check that the roll is loaded correctly. |
| Printer is offline. | The app could not reach the printer when it started, or no printer is selected. Turn on the printer. Go to Admin > Label Printer Settings, then tap TEST CONNECTION. If the test fails, tap Detect Printers and select the printer again. |
| Print failed for {SKU}. Exception: followed by a printer message, such as Printer cover is open., No paper detected. or Paper jam detected. | Fix the problem on the printer. Tap PRINT again. |
| Timed out. | The printer did not confirm the print in time. Check what printed, so you do not print extra labels. Check the printer connection. Print the missing labels again. |
| Printing is stuck, or the printer stops responding | In the Print Label window, tap the menu icon (⋮) at the top right. Tap Reset Printer. Print again. |
| The printer is not found | For Wi-Fi or LAN, check that the printer and the iPad are on the same network. For Bluetooth, check that Bluetooth is on and the printer is paired in the iPad’s Settings > Bluetooth. Tap Detect Printers again. |
| The label does not scan at the counter | Check that the barcode or SKU saved in the Shopcada dashboard is correct. Print the label again. For scanner setup, see Shopcada POS: Setting up hardware. |
